
Understanding Intermediate Basket Weaving Techniques
Advancing from beginner to intermediate basket weaving marks an exciting transition in your crafting journey. Unlike basic projects that focus on simple over-under weaves, intermediate basket weaving introduces more complex techniques that create distinctive shapes, textures, and functional designs.
At this level, you’ve likely mastered foundational skills like creating a basic round or square base, executing simple weaving patterns, and finishing a rim. Now, you’re ready to explore more sophisticated approaches that will challenge your skills while producing beautiful results. Intermediate basket weaving incorporates techniques such as:
- Twill patterns (over-under-over-under variations)
- Oval and asymmetrical shaping
- Advanced rim and border techniques
- Handle integration
- Multiple weaving methods within a single basket
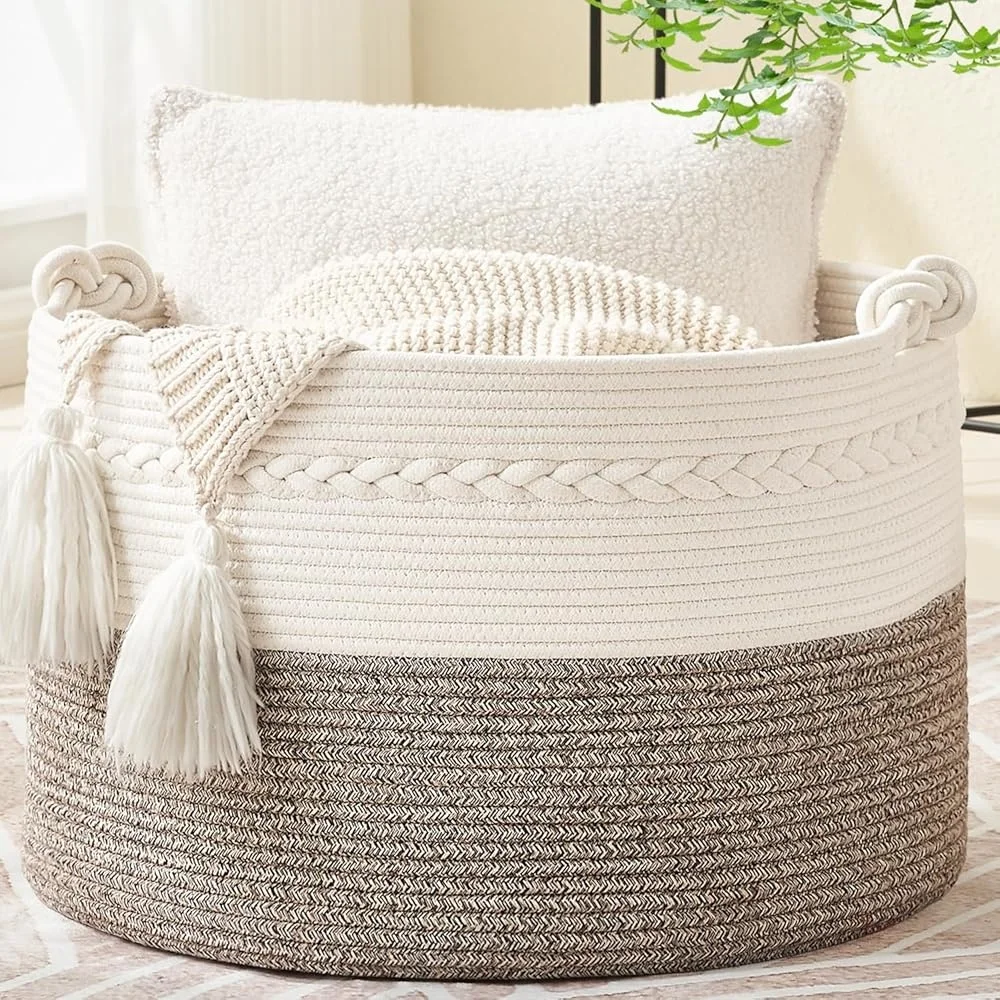
The beauty of these organizing laundry wicker baskets and decorative pieces is their ability to serve dual purposes—providing practical storage solutions while enhancing your home’s aesthetic appeal. Each project in this collection balances artistic expression with functional design, allowing you to create pieces that are both beautiful and useful.
For those who have recently completed basic projects from our beginner guide to basket weaving, these intermediate designs will build upon your foundation while introducing new challenges that develop your technical skills and creative vision.
Essential Tools & Materials for Intermediate Projects
As you advance in your basket weaving journey, having the right tools and materials becomes increasingly important for achieving professional-looking results. Beyond the basic supplies, intermediate projects often require specialized tools that provide greater precision and versatility.
Essential Tools for Intermediate Weavers:
- Awls (flat and pointed) for creating spaces in tight weaving
- Spoke weights to maintain tension on your stakes
- Sharp scissors or garden pruners for clean cuts
- Measuring tape and rulers for consistent sizing
- Clothespins or clips for temporary holding
- Spray bottle for keeping materials moist while working
Material Options:
- Reed varieties: flat reed (for stakes), round reed (for flexible weaving), half-round reed (for rim finishing)
- Natural fibers: willow, seagrass, cane, raffia, and pine needles
- Specialized materials: wooden bases, handle inserts, and decorative elements
Proper material preparation significantly impacts your final results. Most natural weaving materials require soaking before use—typically 15-30 minutes for reed and up to several hours for thicker materials like willow. This essential tools basket weaving guide provides detailed information about selecting the right tools for different project types.
When selecting materials, look for consistency in color, flexibility, and quality. The best reed has a clean, smooth surface without cracks or discoloration. For those interested in exploring various material options, our natural basket weaving guide offers comprehensive information about working with different fibers and their unique characteristics.
Project 1: Oval Market Basket with Swing Handle
The oval market basket represents a perfect step up from beginner projects because it introduces the challenges of non-circular shaping while creating a highly functional piece you’ll use regularly.
Materials Needed:
- 3/8” flat reed for spokes (approximately 20 pieces at 30” length)
- 1/4” flat reed for weaving (approximately 1 lb)
- 3/8” round reed for rim (approximately 6 feet)
- 1/4” round reed for rim filler
- 3/8” flat oval reed for handle
Key Techniques:
Creating an oval market basket requires mastering several intermediate techniques. Begin by arranging your base spokes in an oval pattern, with longer horizontal spokes and shorter vertical ones. The critical skill here is maintaining the oval shape as you build upward—keeping sides straight while allowing the ends to curve naturally.
The swing handle attachment represents another skill level increase. You’ll need to insert the handle ends securely into the basket sides and reinforce these connection points to support weight. Many weavers find that wicker baskets with handles provide excellent examples of professional finishing techniques worth studying.
Practical Applications:
This versatile basket makes an ideal shopping companion for farmers’ markets, serving as both a practical carrier and an eco-friendly statement. At home, it works beautifully for magazine storage, as a picnic basket, or as an elegant display piece when not in use.
Time investment: Approximately 3-4 hours
Finished dimensions: 12×8×7 inches (30×20×18 cm)
Project 2: Twill Weave Storage Basket
Twill weaving introduces pattern complexity through a systematic over-and-under sequence that creates diagonal lines across your basket. This rectangular storage basket showcases how intermediate techniques can transform functional items into decorative accents.
Materials Needed:
- 3/8” flat reed for spokes (approximately 24 pieces)
- 1/4” flat reed in two colors for weaving pattern
- 1/2” flat reed for rim
- 3/16” flat oval reed for lashing
Key Techniques:
The foundation of twill weaving lies in creating patterns by varying how many spokes you weave over and under. A basic 2/2 twill means weaving over two spokes, under two spokes, and so on. For visual interest, this project incorporates color changes that emphasize the diagonal pattern.
Maintaining consistent tension becomes particularly important with twill patterns, as any irregularity becomes immediately visible in the diagonal lines. Square corners present another challenge, requiring careful management of spoke tension and positioning.
For visual aids and additional pattern variations, our DIY wicker basket weaving tutorials provide clear diagrams of various twill patterns and techniques.
Practical Applications:
This structured basket works wonderfully for organizing craft supplies, holding folded guest towels in a bathroom, or displaying small houseplants. The square shape maximizes storage space while fitting neatly on shelves or countertops.
Time investment: Approximately 2-3 hours
Finished dimensions: 10×10×6 inches (25×25×15 cm)
Project 3: Round Reed Coiled Basket with Fitted Lid
Coiling introduces an entirely different basket-making approach that creates tight, sturdy containers perfect for protecting treasured items. This project teaches precision as you create both a container and a properly fitted lid.
Materials Needed:
- 1/4” round reed for core material (approximately 2 lbs)
- Waxed linen thread or raffia for binding
- Tapestry needle
- Optional decorative beads or colored reed
Key Techniques:
Coiling differs significantly from stake-and-weaver methods, as you’ll build the basket by wrapping and stitching around a continuous core of reed. The challenge lies in maintaining even spacing between coils and consistent stitch sizes throughout the project.
Creating a properly fitted lid requires precise measurement and shaping. The lid needs to be slightly larger than the basket opening but shaped to nest securely without being too tight. Studying examples of wicker baskets with lids can provide inspiration for different lid styles and fitting techniques.
Practical Applications:
This basket style creates an heirloom-quality container perfect for jewelry storage, keeping special keepsakes, or housing collections of small items. The fitted lid protects contents from dust while adding a polished look to your creation.
Time investment: Approximately 4-5 hours
Finished dimensions: 8 inches diameter, 4 inches height (20 cm diameter, 10 cm height)
Project 4: Cathead Basket with Wood Base
The distinctive “cathead” basket gets its name from its unique silhouette—straight sides that flare out dramatically before curving back inward at the top, resembling a cat’s head in profile. This project introduces advanced shaping techniques while creating a statement piece.
Materials Needed:
- Pre-cut 8” wooden base (optional, or create your own)
- 3/8” flat reed for spokes
- 1/4” flat reed for weaving
- 1/2” flat reed for rim
- 1/4” round reed for rim filler
Key Techniques:
The cathead shape emerges from careful manipulation of spoke tension and positioning. You’ll start with spokes inserted into a wooden base (or woven base), keeping them vertical until you reach the desired height. Then comes the critical shaping—flaring the spokes outward while continuing to weave, creating the distinctive bulge. Finally, you’ll gradually direct the spokes inward again to create the characteristic curved profile.
The challenge lies in maintaining symmetry throughout this process. Measuring frequently and adjusting spoke positions ensures a balanced final shape. Many weavers find it helpful to create a cardboard template of the desired profile to use as a guide during weaving.
Practical Applications:
The dramatic cathead shape makes this basket an ideal centerpiece or decorative accent. Its wide middle section provides ample storage for fruit displays, dried flowers, or potpourri, while the narrower top helps contain contents.
Time investment: Approximately 3-4 hours
Finished dimensions: 9 inches diameter, 7 inches height (23 cm diameter, 18 cm height)
Project 5: Wicker Storage Basket with Integrated Handles
This substantial storage basket introduces techniques for creating durable, weight-bearing containers with handles integrated directly into the weaving structure rather than added afterward.
Materials Needed:
- 1/2” flat reed for spokes
- 3/8” flat reed for weavers
- 1/4” round reed for triple waling rows
- 5/8” flat reed for rim
Key Techniques:
This project teaches several advanced structural techniques that strengthen your basket. Three-rod waling creates a decorative twist pattern while significantly reinforcing the basket’s structure. You’ll also learn to create integrated handles by extending and pairing selected spokes, weaving them into sturdy grips before reincorporating them back into the basket’s sides.
Creating a basket this size presents challenges in maintaining consistent tension and shape throughout the weaving process. Tips for successful large basket weaving include frequently spraying your work to maintain reed flexibility and using weights or clips to hold spokes in position.
Those interested in practical storage solutions might find additional inspiration in our guide to wicker laundry basket storage ideas, which showcases various designs and organizational approaches.
Practical Applications:
This sturdy basket works perfectly for laundry collection, storing blankets and pillows, organizing children’s toys, or holding firewood beside a hearth. The integrated handles ensure durability when carrying heavier loads.
Time investment: Approximately 4-5 hours
Finished dimensions: 14×14×10 inches (36×36×25 cm)
Project 6: Diagonal Plaited Tea Tray
Moving away from traditional round or oval baskets, this flat tray project introduces diagonal plaiting techniques to create a sturdy surface with raised edges—perfect for serving or display.
Materials Needed:
- 1/4” flat reed cut to equal lengths (approximately 40-50 pieces)
- 1/2” flat reed for rim
- 1/4” flat oval reed for rim lashing
- Optional wood sealer or food-safe finish
Key Techniques:
Diagonal plaiting creates a distinctive pattern by positioning reed strips at 45-degree angles rather than the traditional perpendicular arrangement. The challenge lies in maintaining even spacing and tension across the entire surface while creating a perfectly square or rectangular shape.
For the raised edges, you’ll learn to bend and secure the extending ends of your plaited strips upward before finishing with a sturdy rim. Reinforcing the corners prevents them from collapsing under weight, ensuring your tray remains functional.
Practical Applications:
This versatile tray works beautifully for serving breakfast in bed, organizing bathroom toiletries, displaying collectibles, or corralling remote controls on a coffee table. Adding a food-safe finish makes it practical for serving snacks and beverages.
Time investment: Approximately 2-3 hours
Finished dimensions: 16×12×2 inches (41×30×5 cm)
Project 7: Multi-Purpose Wall Basket with Twined Rim
This innovative basket combines traditional weaving techniques with practical wall-mounting features, creating storage that saves valuable surface space while adding visual interest to your walls.
Materials Needed:
- 3/8” flat reed for spokes
- 1/4” flat reed for weaving
- 1/8” flat reed for twining
- D-ring hanging hardware and screws
- 1/2” flat reed for rim
Key Techniques:
Creating a wall basket requires developing a flat back that sits flush against the wall while maintaining a rounded or D-shaped front. You’ll start with a modified base that’s flat along one side, then maintain this shape as you build upward.
The twined rim adds both decorative interest and structural integrity to the basket’s opening. Twining involves working with two or more weavers simultaneously, twisting them around each spoke to create a rope-like pattern. This technique reinforces the basket’s upper edge while adding visual complexity.
For more wall-mounted storage ideas, our collection of rattan shelf baskets offers inspiration for various shapes and mounting styles that complement this project.

Practical Applications:
Wall baskets solve numerous storage challenges in tight spaces. Use them for mail collection near entryways, kitchen utensil storage, bathroom toiletries, or as decorative plant holders. The flat back ensures they hang securely without damaging walls.
Time investment: Approximately 2-3 hours
Finished dimensions: 10 inches width, 6 inches depth, 12 inches height (25 cm width, 15 cm depth, 30 cm height)
Master Class: Advanced Finishing Techniques
Elevating your baskets from homemade to professional quality often comes down to the finishing details. These advanced techniques add both decorative interest and structural integrity to your creations.
Rim Finishing Methods:
- Standard wrapped rim: Basic technique using flat reed to encase raw spoke ends
- Braided border: Creates a decorative edge using three or more weavers
- Rolled border: Folds spoke ends over to create a smooth, rounded edge
- Double-wrapped rim: Adds extra durability with two layers of rim material
The 3-rod wale border represents one of the most attractive and sturdy finishing options. To create it, position three pieces of round reed behind three consecutive spokes, then bring the bottom reed forward over the next spoke, becoming the top reed in the next grouping. Continue this pattern around the basket’s circumference, creating a twisted, rope-like appearance.
Decorative Elements:
Intermediate weavers can enhance their work by incorporating:
* Dyed reed sections for color accents
* Beads or buttons threaded onto spokes before weaving
* Specialized weave patterns in contrasting materials
* Natural elements like twigs, pine needles, or seagrass
Proper maintenance ensures your baskets last for years. Our guide to non-toxic basket cleaning solutions offers practical advice for keeping your creations in pristine condition without harsh chemicals.
Planning Your Own Intermediate Projects
As your skills grow, you’ll likely feel inspired to create original basket designs that meet specific needs or aesthetic preferences. Planning your own projects allows for creative expression while putting your technical skills to practical use.
When scaling patterns to different sizes, remember these guidelines:
* Base diameter typically equals 1/3 to 1/2 of the finished height
* For every inch of base diameter, add approximately 2-3 spokes
* Calculate material needs by measuring the sample basket’s components and adjusting proportionally
Finding inspiration for original designs can come from unexpected sources:
* Natural forms like seed pods, flowers, or shells
* Traditional baskets from different cultures
* Architectural elements
* Specific storage needs in your home
Consider experimenting with unconventional materials like recycled paper strips, fabric yarn, plastic shopping bags, or natural found materials like honeysuckle vine or kudzu. These alternatives can create distinctive textures and visual interest while often being more environmentally friendly.
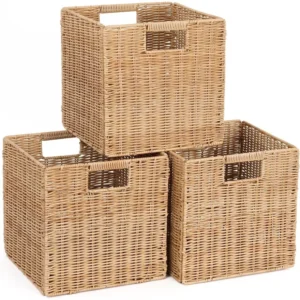

Rattan Shelf Baskets, Rattan Storage Baskets, Small Wicker Baskets, Square Wicker Baskets
Square Plastic Wicker Storage Baskets Set of 3 with Collapsible Design for Cube Storage Organization$185.47 Select options This product has multiple variants. The options may be chosen on the product page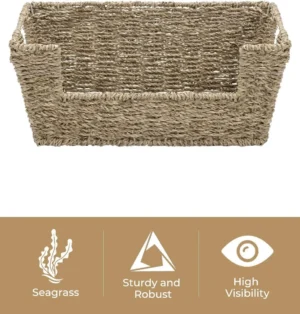

Wicker Baskets with Handles, Wicker Storage Baskets, Woven Storage Baskets
$137.92 Select options This product has multiple variants. The options may be chosen on the product page
Rattan Shelf Baskets, Rattan Storage Baskets
$345.47 Select options This product has multiple variants. The options may be chosen on the product page
Round Wicker Baskets, Wicker Baskets with Handles, Woven Storage Baskets
$177.30 Select options This product has multiple variants. The options may be chosen on the product page
Wicker Baskets with Lids, Wicker Storage Baskets with Lids
$192.98 Select options This product has multiple variants. The options may be chosen on the product page

Wicker Baskets with Handles, Wicker Picnic Baskets
$162.43 Select options This product has multiple variants. The options may be chosen on the product page
Elevating Your Home Décor With Handwoven Baskets
Handcrafted baskets transform ordinary storage into artistic home accents that reflect your personal style while providing practical organization. Strategic placement and thoughtful selection can enhance any interior design scheme.
Design Style Pairings:
- Modern minimalist: Choose baskets with clean lines, neutral colors, and simple patterns
- Farmhouse: Incorporate rustic baskets with natural finishes and traditional shapes
- Bohemian: Mix patterns, colors, and textures with unique shapes and global-inspired designs
- Coastal: Lighter colored baskets with open weaves and natural tones complement beach-inspired décor
When creating a basket collection, consider how pieces will work together. Varying heights, shapes, and weaving patterns while maintaining a consistent color palette or material type creates visual interest without appearing cluttered. Understanding different basket weaving styles helps you choose techniques that complement your existing décor.
In smaller spaces, wall-mounted baskets and multipurpose designs maximize functionality without consuming valuable floor space. Consider stacking graduated sizes or using baskets as decorative covers for less attractive necessities like plastic storage containers or small appliances.
At Tidy Treasure, we believe beautiful organization enhances daily living. Your handcrafted baskets can transform practical storage needs into opportunities for artistic expression while maintaining the orderly, aesthetically pleasing environment that makes a house feel like home.
Resources and Next Steps
As you continue developing your basket weaving skills, numerous resources can support your journey from intermediate to advanced craftsmanship.
Recommended Learning Resources:
- Books: Look for titles focusing on specific techniques rather than general introductions
- Online video tutorials: Slow-motion demonstrations help clarify complex weaving patterns
- Local workshops: Hands-on instruction provides immediate feedback and troubleshooting
- Basket weaving guilds: Connect with other enthusiasts for inspiration and knowledge sharing
Challenge yourself to master increasingly complex techniques:
* Intricate bases with multiple start points
* Lidded baskets with complex fitting mechanisms
* Figurative shapes beyond traditional forms
* Incorporating mixed materials like leather, metal, or ceramics
Many basket weavers find that joining online communities or local craft groups provides motivation and support as they tackle more challenging projects. Sharing your work and seeing others’ creations inspires new ideas while building connections with fellow craft enthusiasts.
For practical applications of your finished pieces, our guide to effortless laundry organization with wicker baskets offers creative ways to incorporate your handmade baskets into everyday household systems.
As your skills advance, you might consider creating custom pieces for specific spaces in your home, designing gifts for friends and family, or even selling your work at craft fairs or online marketplaces. Whatever direction your basket weaving journey takes, these intermediate projects provide a solid foundation for continued growth and creativity.