

Understanding Round Basket Weaving Basics
Basket weaving is one of humanity’s oldest crafts, dating back thousands of years across virtually every culture. Round basket weaving, in particular, combines both practicality and artistry, creating vessels that have stood the test of time. These circular containers have served as gathering tools, storage solutions, and decorative elements throughout human history.
The basic structure of a round basket consists of three main components:
– Base: The flat, circular foundation of the basket
– Sides: The vertical walls that create the container
– Border: The finished rim that provides strength and stability
Before diving into the weaving process, it’s helpful to understand some key terminology:
– Spokes: The rigid elements that form the structural framework
– Weavers: The flexible strands woven between spokes
– Upsetting: The technique of bending spokes upward to form sides
– Randing: Basic over-under weaving pattern
– Twining: Weaving with two weavers twisted around spokes
– Pairing: A specific two-weaver technique for stability
Creating handmade baskets offers more than just a practical storage solution. Many crafters find deep satisfaction in transforming simple natural materials into functional art. Plus, these organizing laundry wicker baskets connect traditional craftsmanship to modern storage solutions while offering an eco-friendly alternative to plastic containers.
Essential Materials for Round Basket Weaving
Selecting the right materials is crucial for successful basket weaving. Natural fibers offer different characteristics that affect both the weaving process and the finished product.
Reed Options
Reed is the most popular and accessible material for beginning basket weavers:
- Round reed: Comes in various diameters numbered from #1 (thinnest) to #6 (thickest)
- Ideal for spokes: #3 or #4
- Best for weavers: #1, #2, or #3
- Flexibility: Good when properly soaked
Durability: Excellent for everyday use
Flat reed: Comes in different widths (1/4” to 1”)
- Best used for: Rims, handles, and reinforcements
- Flexibility: Bends easily in one direction
Finish: Smooth, refined appearance
Flat-oval reed: Combines properties of both round and flat reed
- Best used for: Versatile applications, especially borders
- Strength: Excellent structural integrity
- Appearance: Clean, professional look
Willow Options
Willow offers a more traditional basket weaving experience:
- Requires more preparation (soaking, peeling optional)
- Available in natural colors from pale cream to rich brown
- Usually categorized as brown willow (bark on) or white willow (bark removed)
- More flexible than reed but typically requires longer soaking
Alternative Materials
For experimentation or when traditional materials aren’t available:
- Raffia: Excellent for fine, detailed work
- Cane: Similar to reed but more flexible
- Natural grasses: Gathered locally (requires proper preparation)
- Upcycled materials: Paper strips, fabric strips, plastic bags (for eco-friendly projects)
When starting your first project, consider the size and purpose of your basket. For beginners, a small to medium-sized basket using #3 round reed for spokes and #2 round reed for weavers creates an excellent foundation for learning. Looking at examples of round wicker baskets can provide inspiration for the styles and finishes you might want to achieve.
Tools You’ll Need for Successful Basket Weaving
Proper tools make basket weaving more enjoyable and produce better results. Here’s what you’ll need:
Essential Tools
- Scissors or pruning shears: For cutting reed and other materials (sharp garden scissors work well)
- Spray bottle: To keep materials damp during weaving
- Soaking container: A rectangular plastic tub or basin large enough for your materials
- Measuring tape or ruler: For precise material measurements
- Clothespins or clips: To hold elements in place while weaving
- Awl or knitting needle: For separating spokes and creating spaces
Optional Specialized Tools
- Spoke weight: Helps maintain tension at the base (a large binder clip works as a substitute)
- Packing tool: For tightening rows (a bone folder or butter knife can work)
- Reed cutters: Specialized scissors designed specifically for cutting reed cleanly
Safety Considerations
- Keep cutting tools sharp (dull tools require more force and increase injury risk)
- Always cut away from your body
- Wear finger protection if using an awl extensively
- Keep materials and tools out of reach of small children and pets
Many of these tools will need regular maintenance to remain effective. Learning how to clean wicker baskets and your tools properly will extend their useful life and improve your weaving experience.
Preparing Your Workspace and Materials
A properly organized workspace and well-prepared materials are essential for successful basket weaving.
Workspace Setup
- Choose a comfortable space with good lighting
- Work on a flat, waterproof surface that won’t be damaged by moisture
- Allow enough room to move around your project
- Keep materials and tools within easy reach
- Place a towel beneath your work area to catch drips
Material Preparation Process
Soaking is crucial because it makes rigid natural fibers pliable. When fibers absorb water, their cellular structure temporarily changes, allowing them to bend without breaking.
Soaking Instructions:
- Fill your basin with room temperature water (cold water works but takes longer)
- Submerge your materials completely (placing weights on top if needed)
- Soak according to material type:
– Round reed: 15-30 minutes
– Flat reed: 10-20 minutes
– Willow: 30 minutes to several hours depending on thickness
– Natural grasses: Vary by type, usually 15-30 minutes
The “Bend Test”
To check if materials are properly soaked, gently bend a piece. If it bends smoothly without cracking or showing white stress marks, it’s ready. If it resists or shows stress marks, continue soaking.
Mellowing Technique
After soaking, wrap materials in damp towels to “mellow” them:
1. Lay out a clean, damp towel
2. Arrange soaked materials on the towel
3. Roll up the towel to create a bundle
4. Check periodically and spritz with water if needed
This technique keeps materials workable without being dripping wet and is especially useful when restoring old woven baskets or working on projects that take longer to complete.
Creating a Strong Round Base (Foundation)
The base is the foundation of your basket and determines its size, shape, and stability.
Determining Spoke Count
The number of spokes affects both the structure and appearance:
– For small baskets (under 6” diameter): 12-16 spokes
– For medium baskets (6-10” diameter): 16-24 spokes
– For large baskets (over 10” diameter): 24+ spokes
Tip: Always use an even number of spokes for easier weaving patterns.
Creating a Basic Round Base
Prepare your spokes:
– Cut an even number of spokes to the same length
– For a basic 8” diameter basket, cut 16 spokes approximately 20” long
– Soak spokes until pliableCreate the slath (center cross):
– Divide spokes into two equal groups
– Lay one group flat, parallel, with minimal space between them
– Weave the second group perpendicular through the first group, creating an over-under pattern
– Center the groups so they form an even crossSecure the center:
– Take a thin, flexible weaver approximately 36” long
– Fold it in half to find the midpoint
– Place the midpoint next to a spoke at the center of your cross
– Begin twining: pass each end of the weaver between spokes, always crossing over each other
– Complete 2-3 rounds of twining to secure the centerContinue the base weaving:
– Once the center is secure, transition to basic randing (over-under pattern) with a single weaver
– Keep tension consistent—not too tight (causing cupping) or too loose (causing gaps)
– Add new weavers as needed by overlapping ends behind spokes
– Continue until your base reaches the desired diameter
To check if your base is properly formed:
– It should lie flat without cupping or wobbling
– The weave should be tight enough to hold structure but not so tight it distorts
– Spokes should be evenly distributed like wheel spokes
Looking at wicker baskets with handles can provide inspiration for different base styles that complement various handle designs.
Upsetting the Spokes: Transitioning from Base to Sides
“Upsetting” is the critical technique that transforms your flat base into a three-dimensional basket. This step establishes the shape and angle of your basket walls.
The Upsetting Process
Prepare for upsetting:
– Complete your base to the desired diameter
– Trim any excess weaver, leaving a clean edge
– Ensure all spokes extend outward from the base
– Spray the spokes with water to maintain flexibilityCreate the upset:
– Working with one spoke at a time, bend each spoke upward at a 90-degree angle
– Start at any point and work your way around the basket
– Use your thumb to create a clean bend right at the edge of the base
– Maintain even spacing between spokes as you bendSecure the upset:
– Immediately after upsetting all spokes, add a row of weaving to lock them in position
– Use pairing (two weavers) for the first few rows as this provides more stability
– Keep tension firm but not too tight, as excessive tension can pull spokes inward
Troubleshooting Common Upsetting Problems
- Breaking spokes: If spokes crack during bending, they weren’t soaked thoroughly enough. Replace broken spokes by inserting a new spoke alongside the broken one.
- Uneven spacing: After the first row of weaving, adjust spoke spacing by gently moving spokes before adding more rows.
- Leaning spokes: Use clothespins to temporarily hold spokes at the desired angle while weaving the first few rows.
The upsetting stage is where your basket begins to take shape, establishing the foundation for practical uses like effortless laundry organization with wicker baskets.
Weaving Techniques for Round Basket Sides
Once your spokes are upset, you can begin building the walls of your basket using various weaving techniques. Each technique offers different structural properties and visual appeal.
Basic Randing (Single Weaver)
The simplest weaving pattern uses a single weaver going over and under consecutive spokes:
- Insert your weaver behind a spoke at the base
- Weave in front of the next spoke, then behind the following one
- Continue the over-under pattern around the entire basket
- When you complete a full round, the next row will naturally alternate the pattern
- Pack each row down firmly against the previous one
- Continue adding rows until desired height
Tip: When adding a new weaver, overlap the old and new behind a spoke for about 1.5 inches.
Pairing (Two Weavers)
Pairing creates a stronger structure and decorative twisted effect:
- Position two weavers behind adjacent spokes
- Cross the right weaver over the left and in front of the next spoke
- Cross the left weaver (now on the right) over the other weaver and in front of the next spoke
- Continue this pattern, always crossing the back weaver over the front one
- Each weaver goes in front of one spoke, then behind the next
Three-Rod Waling
This decorative and sturdy technique uses three weavers:
- Position three weavers behind three consecutive spokes
- Take the rightmost weaver, pass it in front of the next two spokes, and behind the third
- Repeat with what is now the rightmost weaver
- Continue this pattern, creating a rope-like appearance
- Usually used as an accent rather than for the entire basket

Maintaining Shape While Weaving
- Keep consistent tension throughout your weaving
- Periodically check your basket’s roundness by looking down from above
- Adjust spoke angles as needed to maintain the desired shape
- For straight sides, keep spokes vertical
- For outward flaring sides, angle spokes slightly outward
- For inward tapering, gradually angle spokes inward
Continue weaving until you reach your desired basket height. These techniques create versatile baskets suitable for many uses, including wicker laundry basket storage ideas for your home.
Creating Professional-Looking Borders
The border not only completes your basket but also provides structural integrity and a finished appearance. Here are three beginner-friendly border techniques:
Simple Trac Border
Prepare the spokes:
– Ensure all spokes are damp and flexible
– Trim spokes to leave approximately 4-5 inches above your last row of weavingCreate the border:
– Bend one spoke to the right, passing it behind the next spoke
– Bring it forward and lay it down parallel to your rim
– Take the next spoke and repeat the process
– Continue around the entire basket
– When you reach the beginning, weave remaining spoke ends under previously laid spokes
– Trim any excess flush with the border
Basic Wrapped Rim
Prepare the spokes:
– Bend all spokes inward toward the inside of the basket
– Trim to approximately 2 inchesCreate the wrap:
– Take a long, thin piece of reed (or seagrass for contrast)
– Starting anywhere on the rim, lay the reed along the inside of the rim
– Wrap the reed around the rim, moving to the outside, then back inside
– Continue wrapping tightly around the entire basket
– Overlap the beginning by 1-2 inches and tuck the end inside
Three-Rod Wale Border
Prepare the spokes:
– Ensure all spokes are damp and extended upward
– Do not trim yetCreate the border:
– Working with three consecutive spokes at a time
– Bend the first spoke behind the second and in front of the third
– Bend the second spoke behind the third and in front of the fourth
– Continue this pattern around the basket
– Tuck the final spokes under earlier ones to secure
– Trim excess flush with the border
For inspiration on professionally finished borders, you might look at our collection of large wicker baskets that showcase various border techniques.
Adding Functional Handles to Your Basket
Handles transform your basket from a decorative container into a practical carrying tool. The type of handle you choose should match your basket’s intended purpose.
Integrated Loop Handle
Prepare for the handle:
– During the upsetting process, select an even number of spokes (usually 4-6) to be used for handles
– These spokes should be longer than the others
– Position these spokes opposite each other on the basketForm the handle:
– After completing the sides and before the border, bend the handle spokes upward
– Form them into an arch over the basket
– Twist or pair them together for strength
– Secure the ends by inserting them back into the basket’s weave
– Reinforce with additional weaving if needed
Attached D-Handle
Create your basket:
– Complete your basket including the border
– Reinforce the rim where handles will attachAttach the handle:
– Position a pre-made wooden or reed D-handle on opposite sides
– Using thin, flexible reed or wire, secure the handle ends to the basket
– Wrap multiple times for strength
– Tuck ends neatly inside the basket
Handle Placement Tips
- For carrying items, place handles directly opposite each other
- For hanging, a single centered handle works best
- Ensure handle attachments are reinforced to bear weight
- Test handle strength before using for heavy items
For practical examples of functional basket handles, check out our best wicker baskets for laundry organization that demonstrate how proper handles enhance usability.
Finishing, Drying and Caring for Your Basket
Proper finishing and drying ensures your basket maintains its shape and lasts for years.
Drying Your Basket
Shape the basket while it’s still damp:
– Adjust any uneven areas
– Ensure the rim is level
– Check that the base sits flatAllow proper air drying:
– Place in a well-ventilated area away from direct sunlight
– Rotate periodically for even drying
– Expect 24-48 hours drying time depending on humidity
– Avoid heat sources like radiators which can cause warping
Final Finishing Touches
- Trim any protruding ends using sharp scissors
- Sand rough spots gently with fine sandpaper
- Remove any remaining “hairy bits” with a slightly damp cloth
Optional Finishes
- Natural (unfinished): Allows the material to develop a natural patina over time
- Clear shellac: Provides light protection while preserving natural appearance
- Beeswax finish: Rub a small amount of beeswax for water resistance and subtle shine
- Food-safe finish: If using for food, choose a mineral oil or specific food-safe sealer

Basket Care Tips
- Avoid prolonged exposure to direct sunlight
- Clean with a soft brush or cloth dampened with water
- For deeper cleaning, use a mild solution of water and white vinegar
- If your basket becomes misshapen, lightly dampen and reshape
- Store in a dry location to prevent mildew
For more detailed care information and storage ideas, our collection of wicker storage baskets provides practical inspiration.

Black Wicker Baskets, Rattan Storage Baskets, Tall Wicker Baskets, Wicker Shelf Baskets, Woven Storage Baskets
5-Tier Distressed Black Wood Frame Storage Tower with Removable Wicker Baskets for Home Organization$715.80 Select options This product has multiple variants. The options may be chosen on the product page
Wicker Laundry Baskets, Woven Laundry Baskets, Woven Storage Baskets
$392.02 Select options This product has multiple variants. The options may be chosen on the product page

Wicker Baskets with Handles, Wicker Storage Baskets, Woven Storage Baskets
$137.92 Select options This product has multiple variants. The options may be chosen on the product page
Large Wicker Laundry Baskets, Tall Wicker Baskets, Woven Laundry Hampers, Woven Storage Baskets
$130.54 Select options This product has multiple variants. The options may be chosen on the product page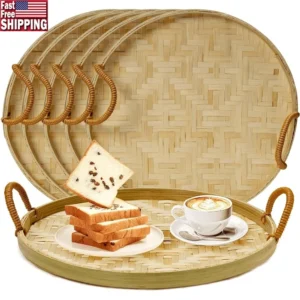
Round Wicker Baskets, Wicker Baskets with Handles, Woven Storage Baskets
$177.30 Select options This product has multiple variants. The options may be chosen on the product page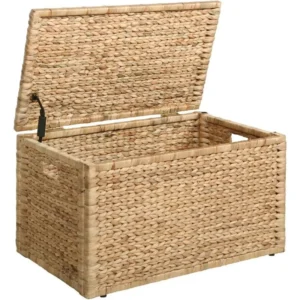
Wicker Storage Trunks, Woven Storage Baskets
$438.26 Select options This product has multiple variants. The options may be chosen on the product page
Troubleshooting Common Basket Weaving Challenges
Even experienced basket weavers encounter challenges. Here are solutions to common problems:
Uneven or Wobbly Base
- Problem: Base doesn’t sit flat on surfaces
- Solution: Dampen the base, place it on a flat surface with a weight on top, and allow to dry completely
Breaking Spokes During Upsetting
- Problem: Spokes crack when being bent upward
- Solution: Ensure materials are thoroughly soaked; replace broken spokes by inserting new ones alongside the broken ones
Loose or Uneven Weave
- Problem: Gaps appear in the weaving pattern
- Solution: Use a packing tool to push rows tightly together; maintain consistent tension throughout
Loss of Round Shape
- Problem: Basket becomes oval or irregular
- Solution: Reshape while damp; use a round form (like a bowl) to maintain shape while drying
Difficulty Adding New Weavers
- Problem: Visible bumps where new weavers are added
- Solution: Overlap weavers behind spokes and trim ends at an angle for smoother transitions
Border Complications
- Problem: Uneven or loose border
- Solution: Ensure all spokes are evenly trimmed and thoroughly soaked before creating the border
Material Drying Out During Weaving
- Problem: Reed becomes brittle and breaks during weaving
- Solution: Keep a spray bottle handy and mist materials frequently; work on smaller sections at a time
Learning proper techniques for storing rattan baskets can help prevent many of these issues in both finished baskets and works in progress.
Enhancing Your Baskets: Beyond the Basics
Once you’ve mastered basic round basket weaving, you can explore creative enhancements to make your pieces unique.
Adding Color
- Natural dyes: Create subtle colors using plant materials like walnut hulls (brown), onion skins (yellow), or berries (pinks and purples)
- Commercial stains: Water-based wood stains work well on reed and willow
- Colored reed: Purchase pre-dyed reed for consistent color
- Application techniques: Dip-dying, painting, or spraying for different effects
Decorative Weaving Patterns
- Twill weaving: Create diagonal patterns by weaving over/under multiple spokes
- Chase weaving: Add a contrasting weaver that “chases” through the basic pattern
- Arrows and diamonds: Create geometric patterns by varying the over/under sequence
Adding Embellishments
- Beads: Thread onto spokes before weaving or add to completed baskets
- Leather wraps: Add leather strips to handles or rims
- Natural elements: Incorporate feathers, shells, or dried flowers
- Fabric: Weave fabric strips for color and texture contrast
Specialized Uses
- Wall hanging baskets: Add a flat back and hanging loop
- Gift baskets: Create dividers inside for multiple items
- Storage solutions: Design with specific items in mind, like craft supplies, bathroom toiletries, or kitchen utensils
For more inspiration on customizing and personalizing your creations, explore our DIY laundry organization wicker baskets guide with creative ideas for practical applications.
Frequently Asked Questions About Round Basket Weaving
How long does it take to weave a round basket?
For beginners, expect to spend 3-5 hours on your first small basket. With practice, a medium-sized basket can be completed in 2-3 hours. Complex designs with special features will take longer.
What’s the best material for beginners?
Reed is ideal for beginners—it’s affordable, readily available, and forgiving. Specifically, #3 round reed for spokes and #2 round reed for weavers provides a good balance of flexibility and strength.
Can I harvest my own materials?
Yes, many plants can be used for basket weaving including willow, honeysuckle, and various grasses. Research proper harvesting times (usually winter for woody materials) and preparation methods for best results.
How do I make my basket stronger?
Use the pairing technique for the first few rows after upsetting and again near the top. Choose appropriate reed sizes—thicker for structural elements, thinner for filling. Add an extra rim or strengthen the existing one with multiple layers.
Where can I buy quality basket weaving supplies?
Specialty craft stores, online basket weaving supply companies, and some art supply stores carry reed and tools. For inspiration, browse our woven storage baskets to see the quality and appearance of professionally made pieces.
How do I fix a basket that’s losing its shape?
Dampen the basket thoroughly with a spray bottle, reshape it by hand, and let it dry completely with a weight inside to maintain the desired shape.
Are certain materials better for wet vs. dry storage?
For items that might dampen the basket (like bathroom items or plants), sealed reed or sea grass offers better moisture resistance. For dry storage, any material works well if properly finished.
Finding Inspiration and Resources for Your Basket Weaving Journey
As you develop your basket weaving skills, connecting with resources and finding inspiration will help you grow as a craftsperson.
Online Communities and Resources
- Basket weaving forums and social media groups
- Video tutorials on platforms like YouTube and specialized craft sites
- Virtual workshops and classes from experienced basket makers
- Pinterest boards dedicated to basket designs and techniques
Books for Basket Weavers
- “The Basket Book” by Lyn Siler (excellent for beginners)
- “Contemporary Basketry” by Sally Goymer (inspiring modern designs)
- “Weaving Natural Materials” by Felicity Gilmour (focuses on sustainable harvesting)
- “The Art of Basketry” by Jo Longhurst (advanced techniques)
Local Resources
- Community college craft courses
- Folk schools and craft centers
- Local basket weaving guilds and clubs
- Cultural centers with traditional crafts programs
- Craft fairs where you can meet other basket makers
Finding Inspiration
Look for basket inspiration everywhere—nature, architecture, textiles, and even in everyday items. The Tidy Treasure collection features beautifully crafted pieces that showcase professional techniques and designs.
For ideas on displaying and using your handmade creations, our guide on decorating rattan storage baskets offers creative suggestions for integrating baskets into your home décor.
As you continue your basket weaving journey, remember that each basket you create builds your skills. Don’t be afraid to experiment with different materials, techniques, and designs to develop your own unique style.