
Understanding the Ancient Art of Basket Weaving
Basket weaving stands as one of humanity’s oldest and most practical crafts, blending functionality with artistic expression for thousands of years. This versatile skill transforms simple materials into containers that have served essential roles in human civilization – from gathering food and storing goods to ceremonial purposes and decorative displays.
Archaeological findings reveal that humans have been creating baskets for over 10,000 years, with some of the oldest discovered specimens dating back to ancient Egypt and the Middle East. What began as purely utilitarian objects gradually evolved into expressions of cultural identity, with distinct patterns and techniques developing across different regions worldwide.
Today, basket weaving enjoys renewed popularity for several compelling reasons. The meditative, rhythmic process offers therapeutic benefits in our fast-paced digital world. The craft’s sustainability aligns perfectly with growing environmental consciousness, as many materials can be ethically harvested from nature or repurposed. Perhaps most importantly, basket weaving creates functional art – beautiful objects that serve practical purposes in daily life.
What makes basket weaving particularly appealing is its accessibility. Beginners can learn basic techniques and create simple yet beautiful baskets within hours, while experienced artisans can spend decades mastering intricate methods like twining, coiling, plaiting, and wicker weaving – the core techniques we’ll explore throughout this guide.
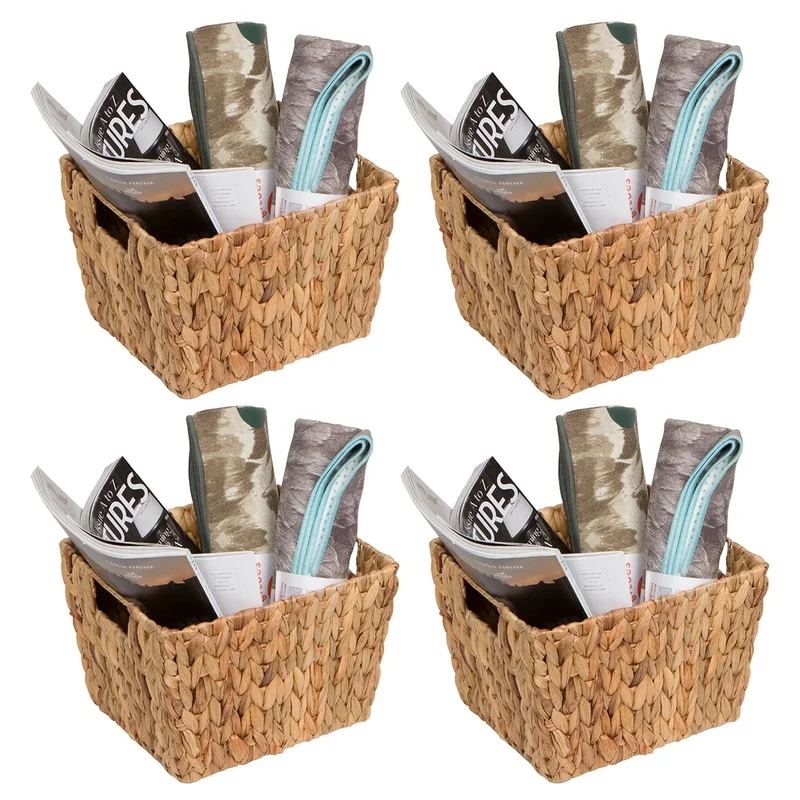
Our collection of wicker baskets illustrates how this ancient craft continues to enhance modern homes with both beauty and functionality, connecting us to traditions that span cultures and generations.
Essential Tools and Materials for Beginner Basket Weavers
Before diving into your first basket weaving project, assembling the right toolkit will set you up for success. Fortunately, you don’t need expensive equipment to get started.
Basic Tools Every Basket Weaver Needs:
- Cutting tools: Sharp scissors or garden pruners for cutting materials to size
- Measuring tools: Tape measure and ruler for consistent sizing
- Soaking containers: Plastic tubs or buckets for preparing reed and other materials
- Clothespins or clips: For holding elements in place while working
- Awl or bodkin: For creating spaces between woven elements when adding new materials
- Spray bottle: To keep materials damp during the weaving process
While specialty basket weaving tools exist, beginners can start with household items. For example, a regular pair of scissors works fine for most materials, though dedicated garden pruners may become worthwhile for tougher materials as you advance.
Essential Materials for Different Basket Styles:
- Reed: The most common and versatile basket weaving material, available in different widths
- Cane: Flexible material often used for intricate work and chair seats
- Willow: Traditional material offering beautiful results with distinctive appearance
- Pine needles: Used primarily in coiled basketry techniques
- Grasses and natural fibers: Including sweetgrass, raffia, and sea grass
Alternative materials include paper strips (from grocery bags or decorative paper), fabric strips, plastic tubing, and even repurposed materials like plastic bags cut into strips. These options make basket weaving more accessible when natural materials aren’t available.
Proper storage is essential for both materials and finished projects. Keep unworked materials in a cool, dry place away from direct sunlight to prevent brittleness. For works in progress, consider covering them with plastic to maintain moisture until you return to weaving.
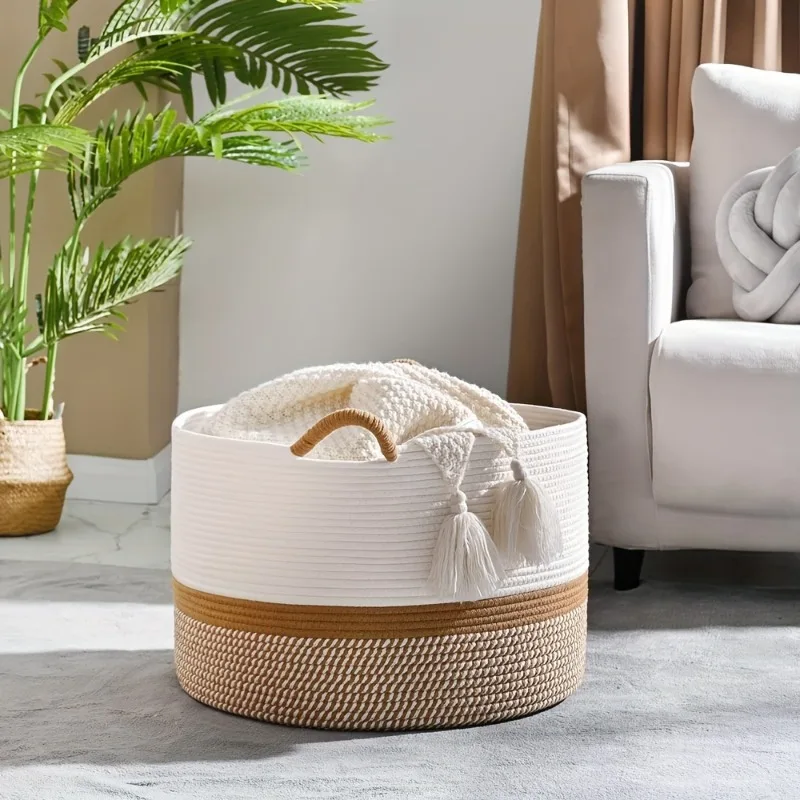
The basic structure seen in many wicker baskets with handles demonstrates how these materials come together to create both beautiful and functional pieces. When choosing materials, also consider their intended use – for example, understanding whether wicker baskets make good laundry containers helps determine the appropriate materials for durability.
Preparing Your Basket Weaving Materials
Proper preparation of materials is crucial for successful basket weaving. This step, though sometimes overlooked by beginners, makes the difference between a frustrating experience and an enjoyable one.
Soaking Natural Materials
Most natural fibers require soaking to become pliable enough for weaving:
- Fill a container with room temperature water (hot water can weaken some materials)
- Submerge your reed, cane, or willow completely
- Soak according to material and thickness:
* Flat reed: 10-15 minutes
* Round reed: 15-30 minutes
* Thick willow: 1-2 days - Test flexibility by gently bending the material – it should curve without snapping
- Keep materials wrapped in a damp towel while working to maintain pliability
Over-soaking can cause materials to become too soft or discolored, while under-soaking leads to breakage and frustration. When in doubt, start with less soaking time and add more as needed.
Preparing Natural Materials
If harvesting your own materials:
- Collect during the right season (often late fall through early spring for many woody materials)
- Remove leaves, branches, and imperfections
- Sort by length and thickness for more consistent weaving
- Allow freshly harvested materials to dry completely before soaking and using
For processed materials like commercial reed:
- Inspect for sharp edges or splinters
- Sand rough spots gently with fine sandpaper
- Sort by width and type before beginning your project
Working with Alternative Materials
Paper and fabric strips require different preparation:
- Cut uniform strips (width depends on your project)
- For paper: fold or roll strips to create a rounded “reed”
- For fabric: consider folding edges inward for a cleaner appearance
- Keep consistent tension when working with these softer materials
Safety is essential when harvesting natural materials. Learn to identify safe plants, obtain necessary permissions, and never over-harvest from any single area. Always wear gloves when collecting prickly materials like some vines.
The quality of your finished wicker storage baskets depends greatly on this preparation stage. Taking time to properly prepare your materials ensures smoother weaving and more professional-looking results.
Mastering the Basic Plaiting Technique
Plaiting, also known as plain weaving, forms the foundation of many basket styles with its simple yet effective over-and-under pattern. This technique creates strong, flat surfaces ideal for basket bases, walls, and even entire structures.
Understanding Plaiting Fundamentals
Plaiting mimics the familiar pattern seen in woven fabric, creating a grid where materials pass over and under each other at right angles. This weave works best with flexible, flat materials like prepared reed, flat willow strips, paper, or fabric strips of consistent width.
Materials Best Suited for Plaiting
- Flat reed in widths from 1/4” to 3/4”
- Prepared flat willow or ash splints
- Paper or fabric strips of consistent width
- Palm or pandanus leaves in tropical regions
Step-by-Step Basic Plaiting Technique
Prepare your materials:
* Soak natural materials until pliable
* Cut all pieces to similar lengths for a consistent edgeCreate the base:
* Lay several parallel strips horizontally on your work surface
* Place a strip perpendicular at the left edge
* Weave this strip over and under the horizontal strips
* Continue adding vertical strips, alternating the starting position (over/under)Establish the pattern:
* If the first vertical strip goes under the first horizontal strip, the next vertical strip should start by going over
* Maintain this alternating pattern for a clean weaveCreating tight corners:
* When reaching the edge of your base, fold vertical strips upward at a 90° angle
* Fold horizontal strips upward, interlacing them with the vertical strips
* This creates the corner structure for your basket wallsBuilding the sides:
* Continue the over-under pattern as you work upward
* Maintain even tension to keep sides straight
Common Plaiting Challenges and Solutions
- Uneven edges: Trim excess material after completing the weave
- Loose weave: Gently push rows together as you work
- Maintaining pattern: Count “over-under” sequences or mark starting positions
- Material breaks: Overlap new pieces with old, tucking ends into the weave
Plaiting creates remarkably sturdy structures with minimal materials. Varying the width of your materials or incorporating different colors creates visual interest within this simple technique. The technique forms the basis for many wicker laundry basket storage ideas seen in homes today.
With practice, you’ll develop the muscle memory to maintain consistent tension and spacing, resulting in clean, professional-looking plaited sections in your baskets.
Creating Strong Structures with Twining Techniques
Twining elevates basket weaving by creating exceptionally strong, flexible structures through a twisting motion rather than simple over-under patterns. This versatile technique forms the backbone of many traditional baskets worldwide and provides both structural integrity and decorative possibilities.
Understanding Twining Basics
Unlike plaiting, twining uses a set of vertical elements (stakes or spokes) that remain stationary while two or more horizontal elements (weavers) twist around them. This twisting action creates a rope-like effect that firmly grips the vertical elements, allowing for incredible strength and the ability to create curved forms.
Setting Up Stakes for Twining
Prepare your materials:
* Select sturdy materials for stakes (thicker reed, willow rods, or dowels)
* Choose flexible materials for weavers (thin reed, cane, or grasses)Create the stake arrangement:
* For a round basket: Cross stakes in the center like spokes on a wheel
* For an oval basket: Arrange stakes in parallel groups with spacers
* For a rectangular basket: Create a grid base with evenly spaced stakesSecure the center:
* Use a basic lashing technique or starting knot to hold stakes in position
* Ensure stakes radiate evenly from the center point
Basic Two-Strand Twining Technique
- Position two weavers behind adjacent stakes
- Begin the twining pattern:
* Move the right weaver in front of the first stake
* Move the left weaver behind the same stake and in front of the next stake
* Continue this alternating pattern, with each weaver passing in front of one stake and behind the next - Maintain tension by gently pulling weavers after each twist
- Continue around the basket, creating rows of twisted pairs
- Add new weavers when needed by overlapping ends with old weavers
Three-Strand Twining (Waling)
This variation creates a distinctive diagonal pattern while adding significant strength:
- Position three weavers behind consecutive stakes
- Follow the pattern:
* Move the rightmost weaver in front of two stakes
* This weaver now becomes the leftmost of the three
* Repeat with the new rightmost weaver - Continue around the basket, maintaining the diagonal pattern
Creating Patterns Through Twining Variations
- Reverse twining: Change direction between rows for decorative zigzag effects
- Open twining: Leave space between rows for an airy appearance
- Colored twining: Incorporate dyed weavers for striking patterns
- Mixed techniques: Alternate between two and three-strand twining for textural interest
Twining allows for incorporating handles, creating divisions, and forming sculptural elements. The technique provides the foundation for many traditional rattan baskets that combine beauty with exceptional durability. The flexibility of twining also makes it perfect for transforming homes with wicker laundry baskets that can be custom-sized to fit specific spaces.
Exploring Coiled Basket Construction
Coiled basketry stands apart from other techniques with its distinctive spiraling structure and nearly limitless design possibilities. Unlike plaiting or twining that require crossing elements, coiling builds baskets by wrapping flexible materials around a solid core, creating strong, seamless vessels.
Principles of Coiling Technique
Coiled basketry consists of two main elements:
- The core material: A sturdy foundation that gives the basket its structure
- The binding material: Flexible material that wraps around the core, securing each new coil to the previous one
This technique allows for extraordinary versatility in shape, size, and design. Coiled baskets can be shallow plates, deep containers, or even closed forms with sculptural elements.
Traditional Coiling Materials
Different cultures have developed coiling techniques using locally available materials:
- Pine needles: Create fragrant baskets with distinctive texture
- Grasses and rushes: Provide flexible, consistent cores
- Raffia: Excellent binding material with natural color variations
- Yucca, beargrass, and sweetgrass: Traditional Native American materials
- Contemporary alternatives: Waxed linen thread, fabric strips, or paper cord
Starting a Coiled Base Successfully
Prepare your core material:
* Bundle several pieces together to create a thickness similar to a pencil
* Soak or dampen if necessary for flexibilityBegin the center coil:
* Form the core material into a small, tight spiral
* Secure with binding material by wrapping and stitchingCreating the first rounds:
* Continue spiraling the core material outward
* Secure each new round to the previous one with consistent stitches
* Maintain even tension to prevent warping
Essential Coiling Stitches
Wheat stitch (most common):
* Pass the binding material through the previous coil, around the current coil, and back through the previous coil
* Creates a characteristic diagonal patternV-stitch:
* Similar to wheat stitch but binding material passes through the previous coil twice
* Creates a V-shaped pattern and adds strengthLazy stitch:
* Binding material wraps around multiple coils at once
* Creates distinctive decorative bands
Shaping Techniques for Coiled Baskets
- Flat base: Maintain coils in a perfect spiral on a horizontal plane
- Bowl shape: Gradually angle coils upward after establishing the base
- Closed forms: Continue decreasing the coil diameter to create a top
- Flared edges: Increase the space between stitches at the rim
Coiling techniques are particularly well-suited for creating distinctive, decorative pieces that enhance home organization. The sturdy nature of coiled construction makes these baskets excellent for wicker laundry baskets that maintain their shape even with heavy use.
By mastering the basic coiling stitch and then experimenting with different core thicknesses and binding materials, you can create baskets with unique personalities and functions.
Wicker Weaving: The Foundation of Traditional Basketry
Wicker weaving, also called stake-and-strand basketry, represents perhaps the most versatile and widely recognized basket-making technique. This method creates sturdy, structured baskets by weaving flexible materials (strands) around fixed vertical elements (stakes), allowing for countless variations in shape, size, and pattern.
Understanding Wicker Weaving Fundamentals
The term “wicker” refers not to a specific material but to the weaving technique itself. While often associated with rattan and reed, wicker weaving can use willow, ash, oak splints, and even synthetic materials. This versatility has made it the dominant technique for both utilitarian and decorative basketry worldwide.
Setting Up a Round Base Using the Slath Method
Prepare your materials:
* Select sturdy stakes (thicker reed, willow, or dowels)
* Choose flexible weavers for the strandsCreate the base structure:
* Arrange an odd number of stakes in pairs, crossing at the center
* Add a single stake if needed to ensure an odd total
* The odd number is crucial for proper weaving patternSecure the center:
* Begin weaving a thin, flexible weaver around the crossed stakes
* Weave in a spiral, going under and over alternate stakes
* Complete several rounds to secure the structureContinue expanding the base:
* Maintain the over-under pattern as you spiral outward
* Keep tension consistent for a flat, even base
* Spread stakes evenly as the base expands
Upsetting the Stakes to Create Sides
This crucial transition transforms a flat base into a three-dimensional basket:
Prepare for upsetting:
* Complete the base to your desired diameter
* Finish with a strong border row or “upsetting row”Bend stakes upward:
* Carefully bend each stake upward at a 90° angle
* Use a tool like a clothespin to hold stakes temporarily if needed
* Ensure spacing between stakes remains consistentSecure the upright position:
* Immediately begin weaving the first row of the sides
* This stabilizes the stakes in their new position
Basic Wicker Patterns: Randing (Plain Weave)
Randing creates the simplest and most common wicker pattern:
- Begin with a single weaver behind any stake
- Weave in a simple over-one-under-one pattern around the basket
- When the weaver runs out, overlap a new weaver by tucking it behind the same stake
- Continue the pattern until reaching desired height
Creating Structure with Waling Techniques
Waling rows add strength and decorative elements:
Three-rod waling:
* Position three weavers behind consecutive stakes
* Move the rightmost weaver in front of two stakes
* This creates a distinctive diagonal pattern
* Use at the base, intervals throughout, and near the rim for stabilityPairing:
* Use two weavers that cross between stakes
* Creates a twisted appearance while securing stake positions

Finishing Wicker Baskets with Borders and Rims
Basic border techniques:
* Single tuck: Each stake is tucked behind the next stake
* Double border: Stakes are tucked behind neighboring stakes twice
* Rolled border: Stakes are paired and rolled inwardAdding a rim:
* Optional reinforcement around the top edge
* Often created with thicker material wrapped around the border
Wicker weaving produces exceptionally versatile and durable woven storage baskets suitable for everything from delicate display items to heavy daily use. The technique is particularly popular for effortless laundry organization with wicker baskets due to its strength and ability to maintain shape even with regular handling.
Creating Decorative Patterns in Your Basket Weaving
While the structural techniques form the foundation of basket weaving, incorporating decorative patterns elevates your creations from purely functional to truly artistic. Understanding how to create visual interest through patterns allows you to express your creativity while maintaining the basket’s integrity.
How Weaving Techniques Inherently Create Patterns
Even the most basic weaving techniques naturally create visual patterns:
- Plaiting: Creates a checkerboard or grid pattern
- Twining: Produces diagonal lines or chevron effects
- Coiling: Forms concentric circles with distinctive stitching patterns
- Wicker weaving: Develops vertical and horizontal rhythms through stake and strand interaction
Adding Color to Your Basket Weaving Projects
Color transforms even simple baskets into eye-catching pieces:
Natural color variations:
* Combine materials with different natural colors (dark willow with light reed)
* Utilize the inner and outer bark of materials for contrast
* Incorporate materials that develop patina over timeDyeing materials:
* Natural dyes: Walnut hulls (brown), berries (purple/red), tea (tan)
* Commercial basket reed dye or fabric dye
* Painting finished sections with diluted acrylic paintColor pattern planning:
* Sketch your pattern before beginning
* Calculate how many colored weavers you’ll need
* Consider how colors will appear when woven together
Creating Visual Interest Through Material Combinations
- Texture contrasts: Smooth reed with bumpy seagrass
- Width variations: Alternate thick and thin materials
- Mixed techniques: Combine twining sections with plaiting for textural interest
- Specialty materials: Incorporate beads, wire, or found objects for unique effects
Simple Pattern Techniques for Beginners
Arrow patterns:
* Change the direction of diagonal weaves to create arrows or chevrons
* Works particularly well in twined sectionsDiamond patterns:
* Create by strategically shifting the over-under pattern in plaited weaving
* Can be enhanced with colored materialsSpiral patterns:
* In coiled baskets, create spirals by varying the spacing of stitches
* In wicker, create spirals by gradually shifting the starting point of each round
Reading Written Basket Patterns and Charts
Much like knitting or crochet, basket weaving has its own pattern language:
* Look for abbreviations like RW (round weaver), FW (flat weaver), and SW (space weave)
* Pay attention to stake counts and spacing specifications
* Use small samples to practice unfamiliar pattern sections before incorporating them into larger projects
The beauty of decorative wicker baskets for laundry organization lies in their ability to blend function with artistic expression. Well-executed decorative patterns transform everyday storage into statement pieces that enhance your home’s aesthetic.
Beginner-Friendly Basket Project: Small Round Reed Basket
Ready to create your first basket? This small round reed basket project introduces fundamental techniques while producing a beautiful, functional piece approximately 6 inches in diameter. Perfect for beginners, this project requires minimal tools and materials but teaches essential skills that form the foundation for more complex projects.
Materials and Tools List
Materials:
* 1/4” flat reed (about 8 oz)
* 3/16” round reed (about 2 oz)
* #3 round reed (about 1 oz) for rim
* Warm water for soaking
Tools:
* Sharp scissors or pruning shears
* Measuring tape or ruler
* Clothespins or clips (8-10)
* Spray bottle filled with water
* Awl or small screwdriver
* Basin for soaking reed
Preparing Your Materials
Soak the materials:
* Flat reed: 10-15 minutes in warm water
* Round reed: 15-20 minutes in warm water
* Keep a spray bottle nearby to maintain flexibilityPrepare the spokes:
* Cut 8 pieces of 1/4” flat reed, each 14” long
* Cut 1 piece of 1/4” flat reed, 7” long (for the odd spoke)
* Soak until completely flexible
Creating the Woven Base
Form the base structure:
* Arrange 4 pieces in a plus sign (+)
* Arrange the other 4 pieces diagonally to form an asterisk (*)
* Place the shorter piece alongside any spoke to create an odd number (17) of spokesBegin weaving the base:
* Select a length of 3/16” round reed for weaving
* Start by wrapping around the center several times to secure spokes
* Weave in an over-under pattern, always going over one spoke and under the nextContinue the base:
* Maintain even tension as you weave outward
* Keep spokes evenly spaced as the circle expands
* When one weaver ends, overlap a new piece behind a spokeComplete the base:
* Weave until the base measures about 4” in diameter
* End the weaving round by tucking the end under previous rows
Setting Up Stakes and Beginning Sides
Upset the spokes:
* Bend each spoke upward at a 90° angle
* Use clothespins to hold spokes temporarily if needed
* Spray with water if spokes begin to dry outStart the side weaving:
* Continue with 3/16” round reed
* Maintain the same over-under pattern as the base
* Complete 2-3 rounds to secure the upright spokes
Incorporating a Simple Decorative Row
Add a triple twining row:
* After several rounds of regular weaving, add a decorative element
* Use three strands of round reed side by side
* Weave them in a three-rod waling pattern (over two, under one)
* Complete one full round of this patternReturn to standard weaving:
* Resume the over-under pattern for several more rounds
* Build sides to approximately 2” in height
Finishing with a Basic Border
Prepare the spokes for finishing:
* Trim any excess weaving material
* Soak the spokes thoroughly if they’ve dried outCreate a simple tuck border:
* Bend the first spoke behind the second spoke
* Bend the second spoke behind the third spoke
* Continue around the basket
* The last few spokes tuck into the loops created by the first spokesAdd a reed rim (optional):
* Soak #3 round reed until flexible
* Position it around the outside of the basket rim
* Secure with thin reed or waxed linen by lashing at regular intervals
This beginner project introduces you to the fundamental techniques used in round wicker baskets while creating a practical item for your home. As you become comfortable with these basics, you can experiment with different materials, sizes, and decorative elements to create unique variations.
Intermediate Project: Market Tote with Handles
Once you’ve mastered basic techniques, this market tote project combines multiple skills to create a functional, durable basket perfect for shopping, gardening, or storage. This rectangular basket with sturdy handles represents an ideal intermediate challenge.
Materials List for Market Tote
Materials:
* 3/8” flat reed (approximately 1 lb)
* 1/4” flat reed (approximately 1/2 lb)
* #3 round reed (approximately 4 oz)
* 1/2” flat oval reed for handles (approximately 8 oz)
* Warm water for soaking
Tools:
* Sharp scissors or reed cutters
* Measuring tape
* Clothespins (12-16)
* Spray bottle with water
* Awl or small screwdriver
* Soaking container
Creating a Plaited Rectangular Base
Prepare base pieces:
* Cut 7 pieces of 3/8” flat reed, each 16” long (horizontal)
* Cut 12 pieces of 3/8” flat reed, each 10” long (vertical)
* Soak until completely flexibleCreate the plaited base:
* Arrange horizontal pieces parallel to each other, about 1/2” apart
* Weave vertical pieces in a basic over-under pattern
* Start each vertical piece with the opposite pattern of its neighbor
* Adjust spacing for an even rectangular shape (approximately 9” × 15”)Secure the base:
* Ensure all pieces are tightly woven
* Adjust if necessary before proceeding
Upsetting Stakes and Weaving Sides
Prepare for upsetting:
* Ensure all base pieces extend at least 3” beyond the woven area
* Crimp each extension at the edge of the weaving to create a 90° angle
* Use clothespins to temporarily hold stakes uprightStart side weaving:
* Begin with 1/4” flat reed
* Weave in basic over-under pattern for 3 complete rounds
* Pack rows tightly against the base and each otherIncorporate triple twining:
* Add a decorative and strengthening row of triple twining
* Use three strands of 1/4” flat reed
* Weave in three-rod waling pattern for one complete roundContinue side weaving:
* Resume basic over-under pattern with 1/4” flat reed
* Complete sides to approximately 7” height
Creating and Attaching Strong Handles
Prepare handle materials:
* Cut 2 pieces of 1/2” flat oval reed, each 24” long
* Soak until extremely pliableForm the handles:
* Bend each piece into an arch
* Determine handle placement on opposite sides of basket
* Mark insertion points approximately 3” apartAttach the handles:
* Insert handle ends between weavers approximately 1” below the rim
* Secure temporarily with clothespinsReinforce handle attachments:
* Use #3 round reed to lash handles securely
* Wrap several times around each handle end and through the basket
* Tuck ends inside basket
Reinforcing High-Stress Areas
Add corner reinforcements:
* Cut 4 pieces of #3 round reed, each 12” long
* Position vertically at each corner, tucking ends under base
* Weave remaining rounds around these reinforcementsStrengthen the rim:
* Add a rim row of triple twining just below the border
* This distributes weight and prevents stretching
Finishing Edges Professionally
Prepare stakes for border:
* Soak thoroughly if dried out
* Trim to approximately 5” above the last woven rowCreate a tucked border:
* Working with one stake at a time, bend behind the next stake
* Bring forward and down in front of the woven rows
* Tuck inside the basket behind one row
* Continue around entire basketAdd rim finish (optional):
* Add #3 round reed around top edge
* Lash in place with thin reed or waxed linen
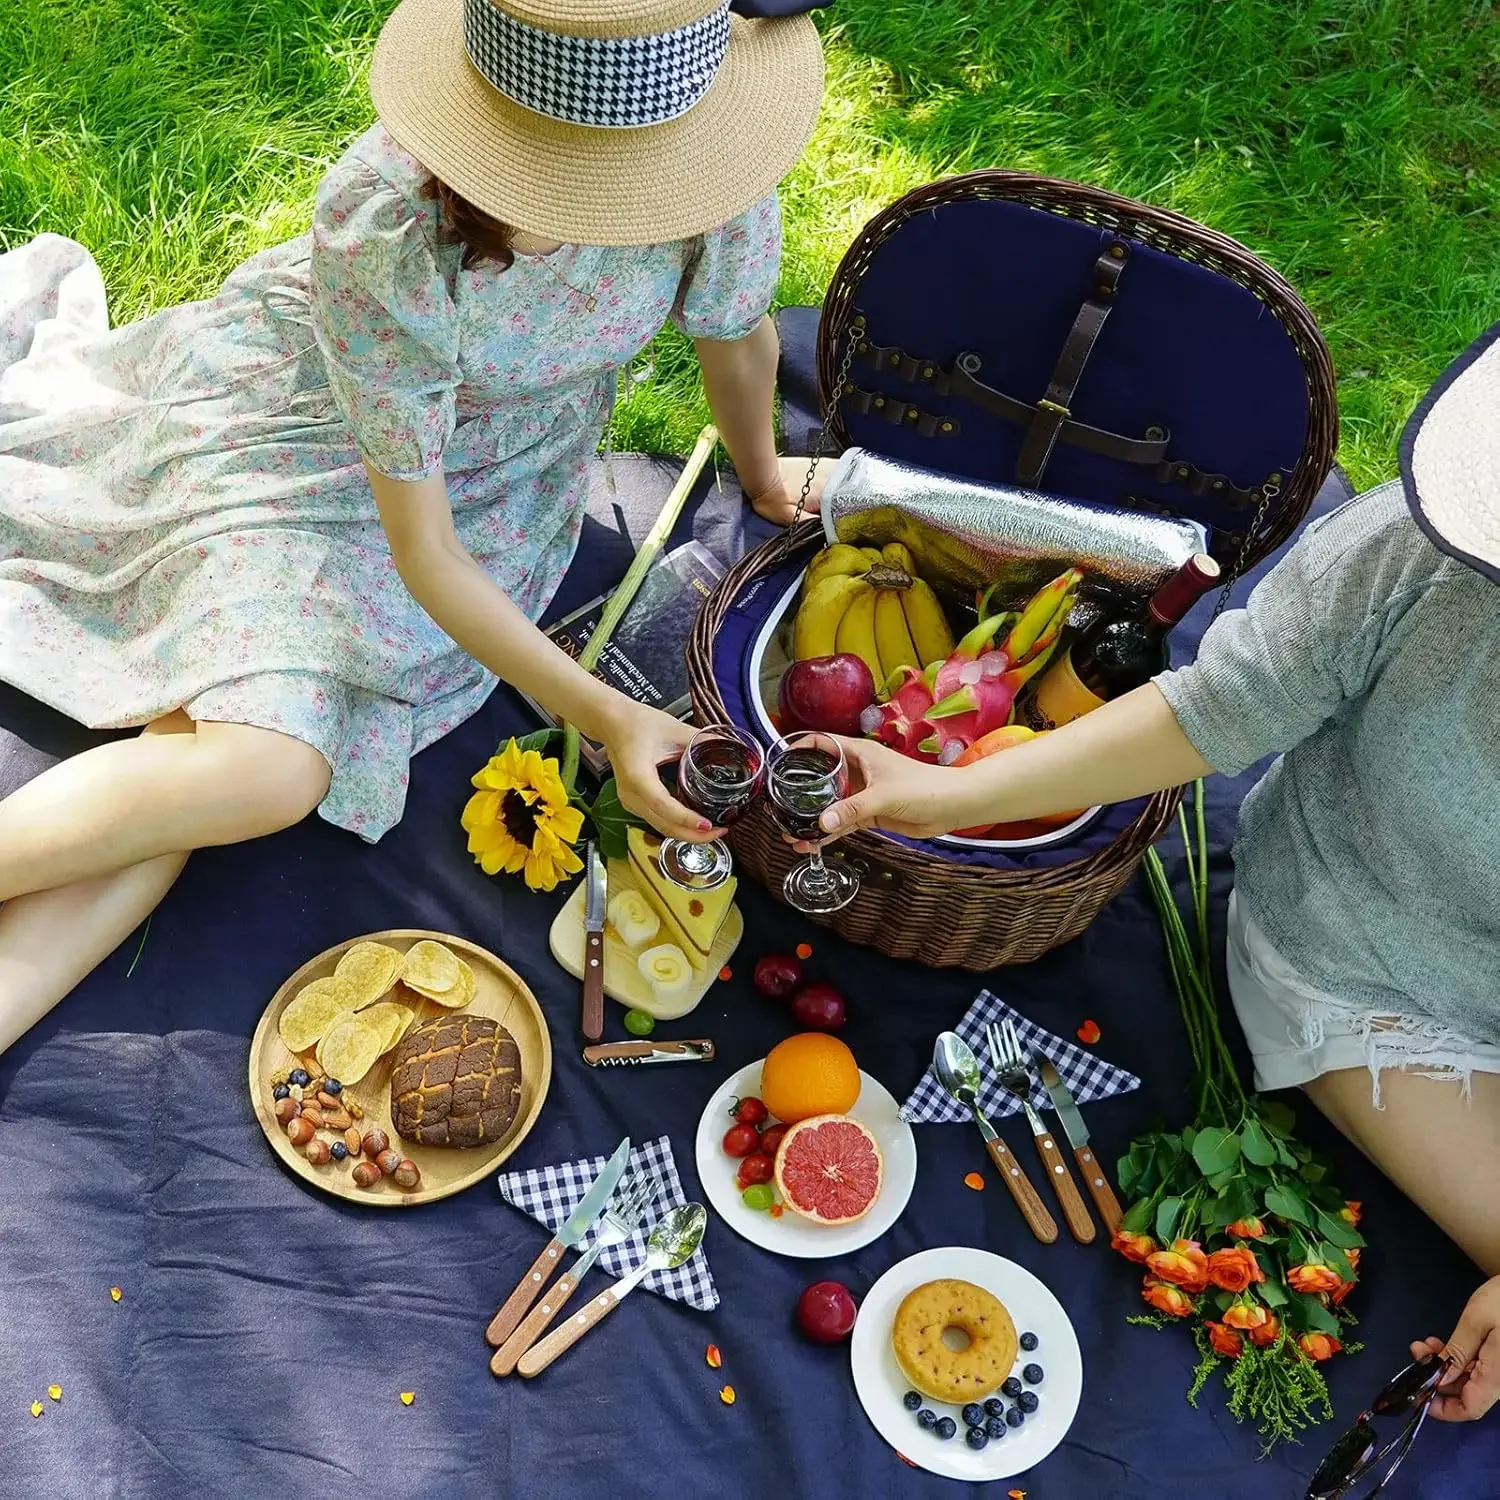
This market tote combines functionality with attractive design. When complete, it can hold approximately 15-20 pounds of groceries or other items. The techniques used in this project mirror those found in high-quality wicker picnic baskets and other functional designs. This versatility makes it similar to the practical applications seen in best wicker baskets for laundry organization where durability meets aesthetics.
Advanced Basket Shaping and Complex Structures
As your skills develop, you can move beyond basic forms to create baskets with distinctive shapes and specialized functions. Advanced shaping techniques transform ordinary baskets into artistic expressions while maintaining their practicality.
Creating Curved and Asymmetrical Shapes
Moving beyond standard round and rectangular forms opens endless creative possibilities:
Controlling curvature:
* Vary stake lengths and angles strategically
* Adjust weaving tension to create gentle curves
* Use guides or forms during weaving to maintain consistent curvesCreating asymmetrical designs:
* Begin with an asymmetrical base shape
* Vary the height of different sections
* Use different weaving patterns in different areas
Techniques for Tapering and Flaring Basket Sides
Shaping the silhouette of your basket creates visual interest and specialized functionality:
Creating tapered sides (narrowing toward top):
* Gradually reduce space between rows as you weave upward
* Trim selected stakes at different heights
* Adjust stake angles inward slightly as you weaveCreating flared sides (widening toward top):
* Space weaving rows farther apart as you work upward
* Add additional stakes or weavers as the circumference increases
* Use “reverse upset” technique to angle stakes outward
Adding Divisions and Compartments
Internal dividers transform simple baskets into organized storage solutions:
Basic divider techniques:
* Insert additional stakes perpendicular to the base
* Weave these stakes along with the original structure
* Create partial dividers or complete compartmentsMulti-level dividers:
* Stagger divider heights for tiered storage
* Secure dividers with additional twining rows
* Create removable dividers with separate mini-woven panels
Creating Fitted Lids with Various Closure Types
Lids add functionality and visual completion to your baskets:
Basic fitted lid construction:
* Create a separate woven panel slightly larger than the opening
* Add a lip that fits inside the basket
* Weave a border that overlaps the outside rimClosure options:
* Simple knob or loop attachment
* Toggles and loops for secure closure
* Hinged attachment for connected lids
Reinforcement Techniques for Larger Structures
Larger baskets require special consideration to maintain structural integrity:
Reinforced base techniques:
* Double the number of base stakes
* Add wooden or metal supports beneath the weaving
* Create thicker base sections through multiple layersSide support methods:
* Add vertical reinforcement rods
* Create thicker sections at stress points
* Incorporate additional twining rows at regular intervals
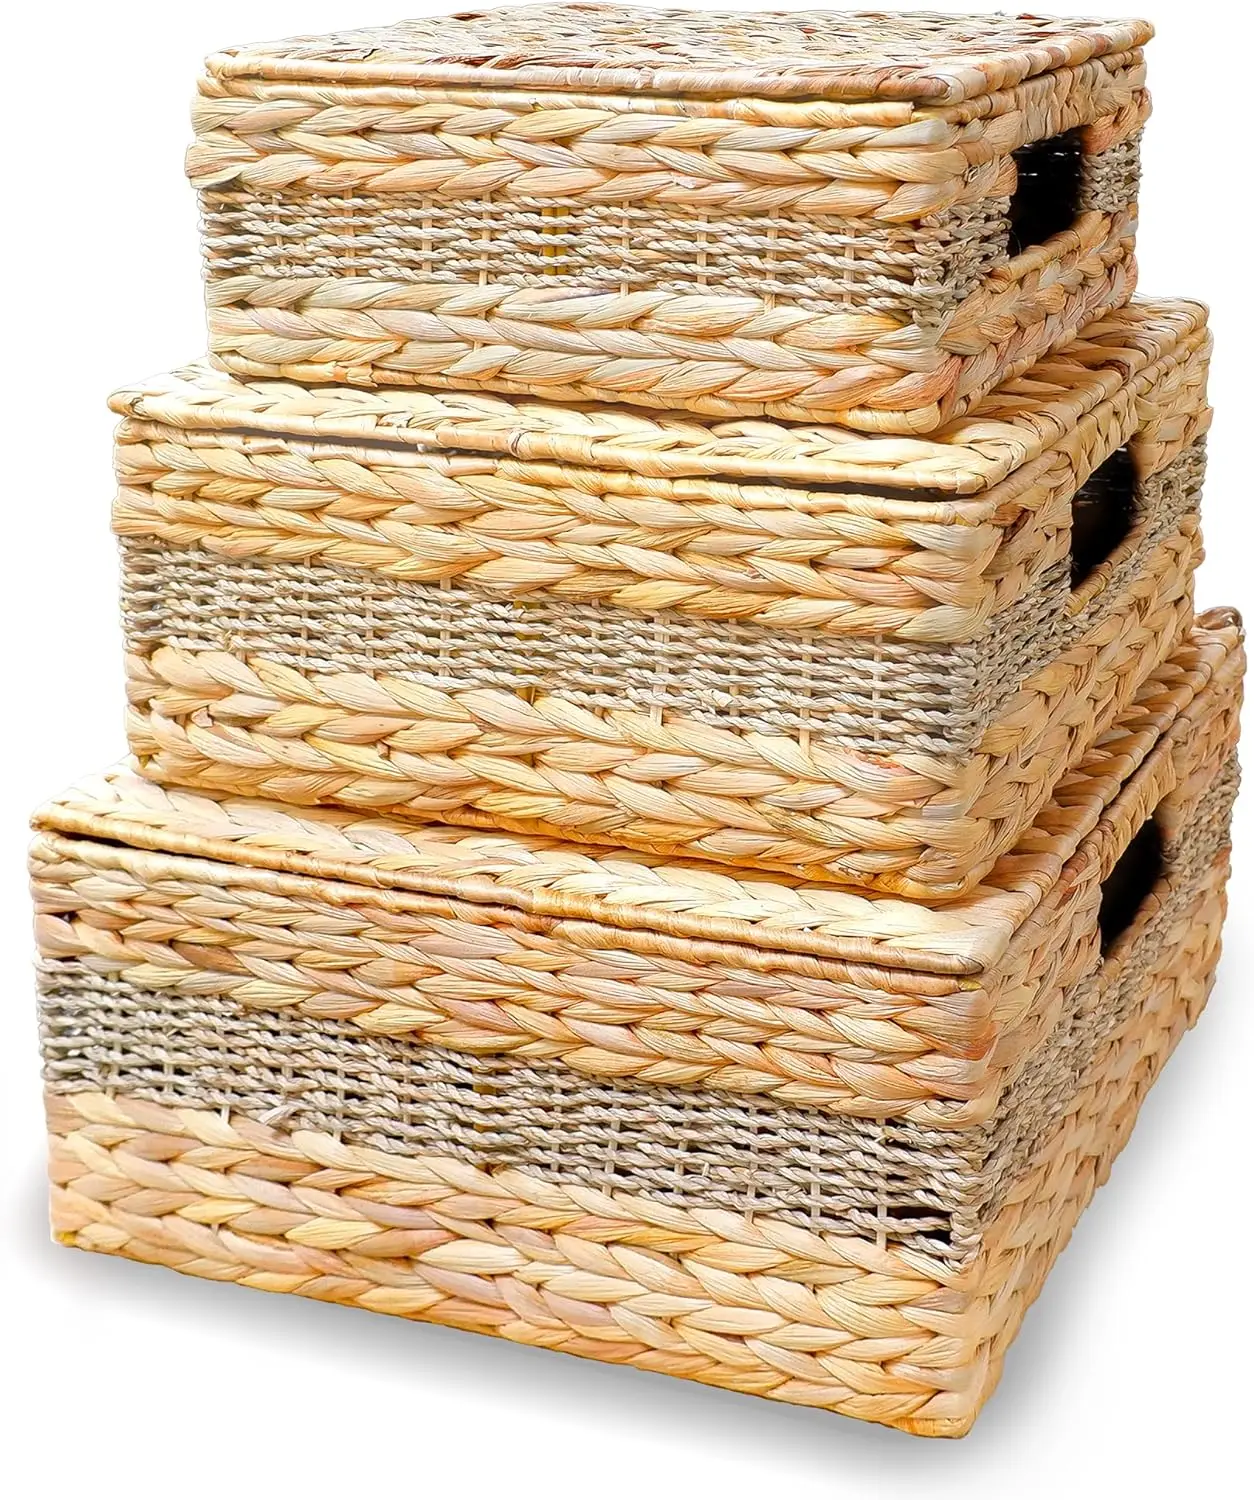
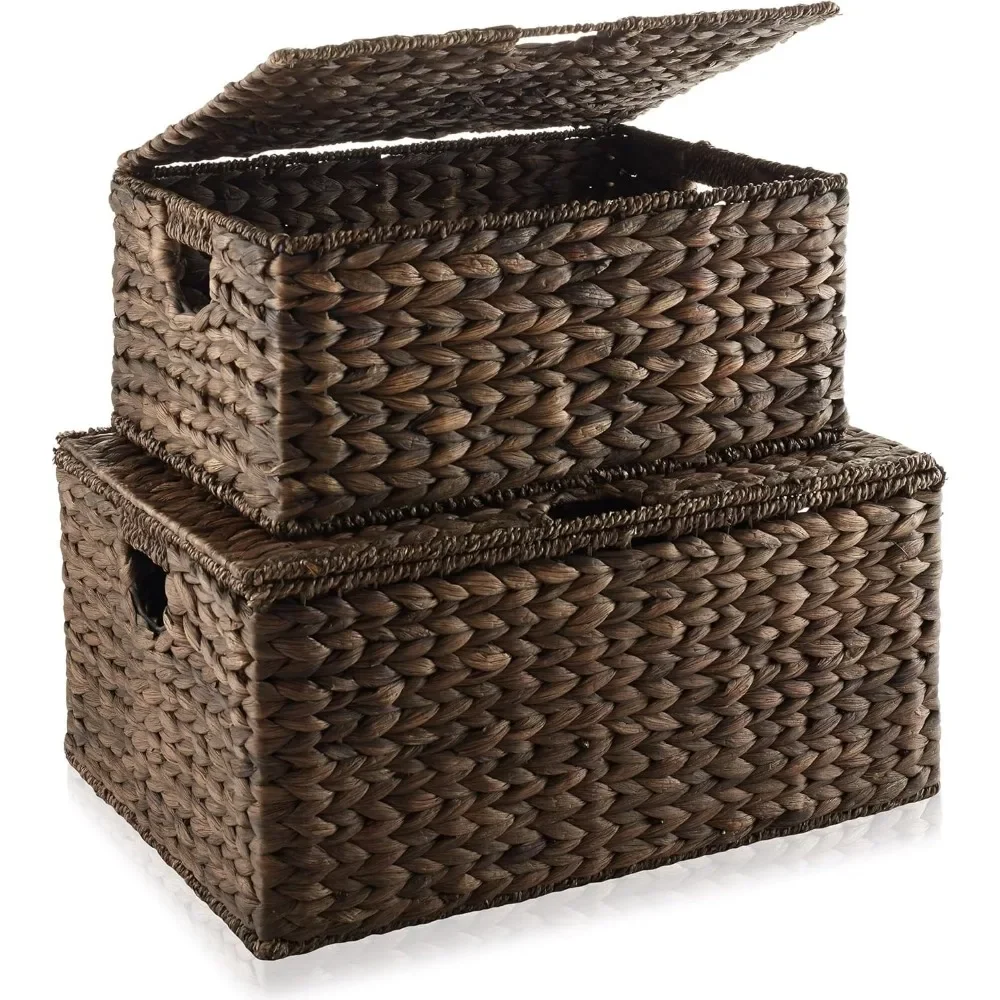
These advanced techniques allow you to create specialized baskets like those found in our collection of wicker baskets with lids that combine beauty with practical function. Similar principles apply when creating multi-compartment top-rated wicker baskets for sorting laundry that keep different items neatly separated.
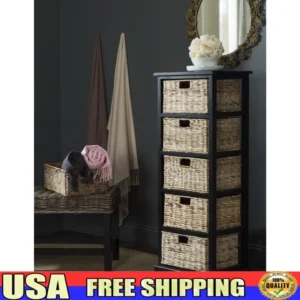

Black Wicker Baskets, Rattan Storage Baskets, Tall Wicker Baskets, Wicker Shelf Baskets, Woven Storage Baskets
5-Tier Distressed Black Wood Frame Storage Tower with Removable Wicker Baskets for Home Organization$715.80 Select options This product has multiple variants. The options may be chosen on the product page
Wicker Laundry Baskets, Woven Laundry Baskets, Woven Storage Baskets
$392.02 Select options This product has multiple variants. The options may be chosen on the product page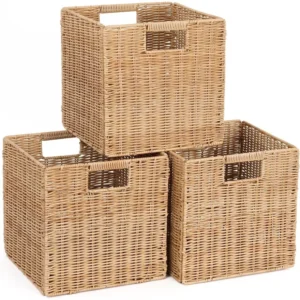
Rattan Shelf Baskets, Rattan Storage Baskets, Small Wicker Baskets, Square Wicker Baskets
Square Plastic Wicker Storage Baskets Set of 3 with Collapsible Design for Cube Storage Organization$185.47 Select options This product has multiple variants. The options may be chosen on the product page

Wicker Baskets with Handles, Wicker Storage Baskets, Woven Storage Baskets
$137.92 Select options This product has multiple variants. The options may be chosen on the product page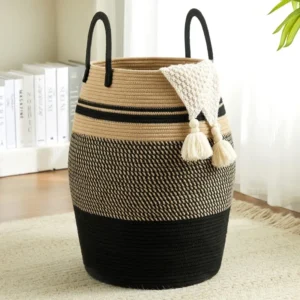
Large Wicker Laundry Baskets, Tall Wicker Baskets, Woven Laundry Hampers, Woven Storage Baskets
$130.54 Select options This product has multiple variants. The options may be chosen on the product page
Wicker Blanket Baskets, Woven Laundry Baskets
$89.60 Select options This product has multiple variants. The options may be chosen on the product page
Decorative Finishing Touches and Embellishments
The difference between a functional basket and an artistic piece often lies in the finishing details. Embellishments not only enhance visual appeal but can also strengthen structural elements and create a signature style for your work.
Decorative Border Options Beyond Basic Rims
The border of your basket provides an opportunity for creative expression:
Braided borders:
* Create a three-strand braid with excess stakes
* Fold and tuck into the basket for a clean finishWrapped rims:
* Wind thin, flexible material around the rim
* Create patterns with color changes or spacing variationsScalloped edges:
* Form regular curves along the rim
* Secure with twining or lashing techniques
Incorporating Beads, Shells, and Found Objects
Natural and decorative elements add personality to your baskets:
Adding beads:
* Thread onto weavers before incorporating into the basket
* Add to completed areas using thin wire or waxed thread
* Create patterns or random distributionsNatural embellishments:
* Attach shells, seed pods, or small pinecones
* Incorporate feathers, dried flowers, or leaves
* Use natural elements that complement the basket materialsFound object incorporation:
* Weave in small pieces of driftwood, beach glass, or pottery shards
* Add vintage buttons, hardware, or small ornaments
* Create themes that tell a story through objects
Adding Wrapped Handles and Decorative Elements
Handles offer both functional and decorative opportunities:
Wrapped handle techniques:
* Cover basic handles with decorative wrapping
* Use contrasting colors or textures
* Add beads or charms to wrappingSculptural handle forms:
* Create twisted or braided handles
* Form asymmetrical or unusually shaped grips
* Incorporate natural branches or forms
Natural Dyes and Colorants for Basket Materials
Adding color creates distinctive baskets:
Natural dye sources:
* Black walnut hulls for browns
* Onion skins for yellows and oranges
* Berries for purples and reds
* Tea, coffee, or tobacco for warm brownsApplication techniques:
* Dye materials before weaving for uniform color
* Create dip-dyed effects for gradients
* Paint selective areas for patterns
Many of these decorative techniques can be seen in creative DIY laundry organization with wicker baskets projects where personalized touches transform ordinary storage into statement pieces. Even simple embellishments can significantly change the character of a basket, making it uniquely yours.
Troubleshooting Common Basket Weaving Problems
Even experienced basket weavers encounter challenges. Understanding how to diagnose and fix common problems will save you frustration and help you create more professional results.
Fixing Uneven Tension and Loose Weaving
Inconsistent tension is the most common issue in basket weaving:
Diagnosing tension problems:
* Visible gaps between weavers
* Basket sides that bow in or out
* Weavers that slip out of positionSolutions:
* Use clothespins to hold weavers temporarily while adjusting
* Pack rows firmly using a packing tool or flattened reed
* Mist overly tight areas with water to allow slight expansion
* Work in smaller sections, maintaining consistent pressure
Repairing Broken or Cracked Materials During Weaving
Materials sometimes break despite careful preparation:
Immediate repairs:
* For broken weavers: Overlap a new piece behind a stake
* For split reed: Either replace or temporarily secure with thread
* For cracked stakes: Reinforce with a parallel stake or replacePrevention strategies:
* Keep materials properly moistened
* Avoid sharp bends in brittle materials
* Pre-test flexibility before attempting tight curves
Correcting Misshapen Baskets
Shape issues can often be corrected:
Fixing lopsided baskets:
* Rewet the entire basket
* Reshape by hand while damp
* Allow to dry with supports holding the correct shapeCorrecting uneven rims:
* Trim stakes to even height before creating borders
* Use measuring tools to ensure consistent rim height
* Add a round reed rim to disguise minor irregularities
Addressing Gaps Between Weavers
Gaps detract from both appearance and functionality:
Prevention techniques:
* Pack each row firmly before starting the next
* Maintain consistent weaver width
* Use appropriately sized materials for the basket scaleFixing existing gaps:
* Insert thin filler material into gaps
* Add decorative elements to disguise problem areas
* In extreme cases, remove and reweave sections
Adding Material Smoothly Without Visible Joins
Seamless material additions create professional-looking baskets:
Basic joining techniques:
* Overlap new and old weavers for several inches
* Position joins behind stakes to hide them
* Taper ends of materials for smoother transitionsAdvanced joining methods:
* Scarfed joints (angled cuts that overlap)
* Hidden internal splices
* Strategic placement of joins at pattern changes
Understanding these troubleshooting techniques helps maintain your baskets long-term. For more comprehensive information on keeping your woven items in top condition, explore our guide on proper basket care and maintenance which covers both repair and preventive techniques.
Caring for and Preserving Your Handcrafted Baskets
The effort you invest in creating beautiful baskets deserves equal attention to their maintenance. Proper care ensures your handcrafted pieces will remain functional and attractive for many years.
Cleaning Methods for Different Basket Materials
Each material requires specific cleaning approaches:
Reed and cane baskets:
* Dust regularly with a soft brush or vacuum with brush attachment
* Clean with a barely damp cloth for occasional deeper cleaning
* For stubborn dirt, use a soft toothbrush with mild soapy water
* Always dry completely after any moisture exposureWillow and bark baskets:
* Avoid water cleaning when possible
* Wipe with a dry cloth or use compressed air for dust in crevices
* For necessary cleaning, use minimal moisture and dry immediatelyGrass and natural fiber baskets:
* Dust carefully with a soft brush
* Avoid water which can cause mildew and deterioration
* Sun occasionally to prevent mustiness
Storage Recommendations
Proper storage prevents damage and deformation:
Ideal storage conditions:
* Cool, dry location away from direct sunlight
* Avoid attics, basements, and areas with temperature fluctuations
* Maintain moderate humidity (40-60%)Stacking considerations:
* Nest similar-sized baskets when possible
* Place tissue paper between stacked baskets
* Never place heavy items on delicate basketsShape maintenance:
* Fill baskets with acid-free tissue paper to maintain shape
* Rotate stored baskets periodically to prevent stress
* Store hanging baskets properly supported
Moisture Considerations for Natural Fiber Baskets
Moisture control is crucial for longevity:
Preventing moisture damage:
* Use basket liners for plants or damp contents
* Place protective barriers under baskets in bathrooms or kitchens
* Rotate baskets used in humid environmentsAddressing moisture problems:
* If a basket becomes damp, dry thoroughly in indirect airflow
* Treat any signs of mildew immediately with diluted vinegar
* Reshape while drying if necessary
Protecting Baskets from Insects and Environmental Damage
Natural materials can attract pests:
Preventive measures:
* Inspect baskets regularly for signs of insects
* Consider cedar blocks or lavender sachets as natural deterrents
* Keep food-containing baskets especially cleanSunlight protection:
* Avoid prolonged direct sunlight which causes fading and brittleness
* Rotate display baskets to ensure even exposure
* Consider UV-filtering window treatments for display areas
With proper care, well-made baskets can last for generations. Many customers find that high-quality wicker baskets as elegant laundry solutions maintain their beauty and functionality for decades when properly maintained.
Inspirational Basket Weaving Styles from Around the World
Basket weaving traditions span every continent, with each culture developing distinctive techniques, materials, and styles that reflect their environment and needs. Understanding these diverse approaches can inspire your own creative explorations.
Native American Basketry Traditions
The indigenous peoples of North America developed some of the world’s most sophisticated basketry:
- Cherokee double-weave baskets: Creating two integrated layers for strength and design possibilities
- Pomo feathered baskets: Incorporating tiny feathers and shell beads into incredibly fine weaving
- Apache coiled baskets: Featuring distinctive geometric designs and storytelling elements
- Northwest Coast cedar bark baskets: Utilizing the region’s abundant cedar trees with distinctive twining techniques
African Basket Weaving Innovations
Africa’s diverse basket traditions demonstrate exceptional creativity:
- Zulu ilala palm baskets: Tight coiling with distinctive geometric patterns and remarkable color work
- Ghanaian bolga baskets: Created using twisted grass with vibrant dyed patterns
- Tutsi peace baskets: Rwanda’s distinctive coiled sisal baskets with pointed lids
- South African telephone wire baskets: Contemporary adaptation using colorful plastic-coated wire
Asian Bamboo and Rattan Mastery
Asia’s basket traditions often utilize bamboo and other abundant materials:
- Japanese bamboo basketry: Elevating functional items to fine art through precision and minimalism
- Chinese bamboo weaving: Creating both practical items and complex sculptural pieces
- Filipino buri palm baskets: Utilizing palm leaves for colorful, durable market baskets
- Vietnamese water hyacinth baskets: Transforming invasive plants into beautiful, functional items
European Willow and Splint Traditions
Europe’s basketry focuses on willow and wood splints:
- English willow basketry: Creating everything from garden trugs to fishing creels
- Scandinavian birch bark containers: Utilizing this durable natural material for lasting vessels
- Spanish esparto grass baskets: Creating incredibly strong containers from humble materials
- Eastern European potato baskets: Distinctive open weave designs for agricultural use
These diverse traditions demonstrate how basket weavers adapt to available materials while developing distinctive cultural styles. Our collection of specialty baskets showcases how these various global traditions continue to influence contemporary basket design, creating pieces that honor traditional techniques while serving modern needs.
Where to Find Basket Weaving Materials and Resources
Finding quality materials and learning resources is essential for developing your basket weaving skills. Whether you’re just beginning or looking to expand your expertise, these sources will help you locate what you need.
Online Retailers for Basket Weaving Supplies
Several specialized vendors offer comprehensive selections:
- Basket Weaving Supply Specialists: Offering complete selections of reed, cane, seagrass, tools, and kits
- Craft Supply Websites: Many carry basic reed and some specialized materials
- Etsy and Artisan Marketplaces: Individual sellers offering unique materials, including natural materials that may not be available elsewhere
- Woodworking Supply Companies: Often carry specialized basket weaving tools
Sustainable Material Sourcing Options
For those interested in harvesting their own materials:
- Local Willow Sources: Many basket weavers grow their own willows or find local sources
- Foraging Guidelines: Learn proper harvesting techniques and permissions needed
- Invasive Species Programs: Some regions encourage harvesting of invasive vines or plants for crafts
- Recycled Material Sources: Paper, fabric, and plastic materials can be repurposed for contemporary basketry
Books and Publications for Further Learning
Key resources for developing skills:
- Beginner Guidebooks: Step-by-step instructions with clear photographs
- Technique-Specific Books: Detailed explorations of individual methods like twining or coiling
- Cultural Basketry Books: Studies of regional traditions and techniques
- Pattern Books: Collections of projects with complete instructions
Online Communities and Forums
Connect with fellow basket weavers:
- Basketry Facebook Groups: Active communities sharing projects and advice
- Craft Forums: Sections dedicated to basketry techniques and troubleshooting
- Instagram Hashtags: Follow tags like #basketweaving #basketmaker to find inspiration
- YouTube Channels: Video tutorials ranging from basic to advanced techniques
Workshops and Classes
Hands-on learning opportunities:
- Local Craft Centers: Many offer beginner basketry classes
- Folk Schools: Intensive workshops in traditional crafts including basketry
- Online Courses: Video-based learning with downloadable instructions
- Cultural Centers: Opportunities to learn traditional techniques from master artisans
These resources connect you to both materials and knowledge. As you explore different techniques, you might find inspiration in our wicker laundry baskets collection, which showcases how traditional weaving techniques translate into contemporary household items that blend functionality with artistry.
Why Handcrafted Baskets Are Making a Modern Comeback
In an era dominated by mass-produced plastic containers, handcrafted baskets are experiencing a remarkable resurgence. This revival speaks to deeper cultural shifts in how we value objects in our homes and the stories they tell.
The Rise of Handcrafted Items in Contemporary Homes
Several factors drive the renewed interest in handmade baskets:
- Reaction against disposable culture: As consumers become more environmentally conscious, many seek alternatives to short-lived plastic products
- Desire for uniqueness: Mass-produced items lack the character and variation that make handcrafted baskets special
- Appreciation for craftsmanship: Growing recognition of the skill and time invested in handmade items
- Connection to maker: Knowing who created an item adds personal significance
Sustainability Aspects of Basket Weaving
Baskets represent sustainable design principles:
- Renewable materials: Many basket materials like reed, willow, and grasses are rapidly renewable resources
- Biodegradable construction: Natural fiber baskets eventually return to the earth, unlike plastic alternatives
- Repair-friendly design: Well-made baskets can be mended rather than discarded when damaged
- Multi-generational lifespan: Quality baskets often become heirlooms passed between generations
Modern Applications for Traditional Baskets
Today’s homes find countless uses for baskets:
- Tech organization: Attractive solutions for managing cables, chargers, and devices
- Plastic reduction: Replacing plastic bins with natural alternatives in kitchens and bathrooms
- Child-friendly storage: Safe, splinter-free containers for toys and supplies
- Decorative solutions: Adding texture and warmth to contemporary interiors
Connection to Broader Craft Movements
Basket weaving fits within larger trends:
- Slow craft revival: Part of a movement valuing process and mindfulness
- Traditional skills preservation: Keeping ancient techniques alive through modern practice
- Maker communities: Connected to broader handcraft communities emphasizing skills-sharing
- Digital detachment: Offering tactile experiences away from screens
The understanding of real differences between basket styles helps consumers appreciate the craftsmanship and specific applications of various basket types, making more informed choices for their homes. As interior design continues to emphasize natural materials and sustainable choices, handcrafted baskets serve both practical needs and aesthetic desires.
Is Basket Weaving Right for You? Questions to Consider
Before investing time and resources in basket weaving, consider these key questions to determine if this craft aligns with your interests, abilities, and available resources.
What space requirements do I need for basket weaving?
Working space considerations:
* You’ll need a flat surface approximately 3 feet by 3 feet minimum
* Access to water for soaking materials (sink, tub, or buckets)
* Ideally, a space where projects can remain undisturbed between sessions
* Adequate lighting to see weaving details clearly
* Storage space for materials and tools
Basket weaving doesn’t require a dedicated studio—many weavers work at kitchen tables or in living spaces. However, some projects create mess from trimmed materials and water splashes, so protect surfaces accordingly.
How much time does basket weaving require?
Time commitment varies widely:
* Simple beginner projects: 2-4 hours
* Medium complexity baskets: 4-8 hours
* Complex or large baskets: 10-40+ hours
* Material preparation: Additional 1-2 hours
Basket weaving can adapt to different schedules. Some weavers work for short daily sessions, while others prefer weekend workshops. The craft allows for stopping and resuming as needed, making it compatible with busy lifestyles.
What physical requirements should I consider?
Physical considerations include:
* Hand strength and dexterity for manipulating materials
* Good close-up vision (or appropriate glasses) for detailed work
* Ability to maintain seated position for extended periods
* Some projects require moderate hand strength for bending resistant materials
Adaptations exist for various physical needs. Tools like soaking materials longer can reduce required hand strength, and magnifiers help with vision challenges.
What’s the initial cost to start basket weaving?
Starting costs are relatively modest:
* Basic tool set: $20-50
* Starter materials for several small projects: $30-75
* Instructional resources: $0-40 (many free resources available online)
* Total typical starter investment: $50-150
Compared to many crafts requiring expensive equipment, basket weaving has a low entry barrier. Materials can often be purchased in small quantities for initial projects.
How can I try basket weaving before committing?
Low-commitment options include:
* Community center or craft store workshops (typically $25-75)
* Basket weaving kits with pre-cut materials ($15-40)
* Online video tutorials using household materials
* Craft fair demonstrations where you can try techniques
These entry points allow you to experience the craft’s basic techniques before investing in specialized tools and materials. Many crafters find that the tactile satisfaction and useful results make basket weaving a rewarding hobby worth pursuing.
Glossary of Essential Basket Weaving Terms
Understanding the terminology used in basket weaving helps you follow patterns, communicate with other weavers, and develop your skills more effectively. This glossary covers the fundamental terms you’ll encounter.
Base: The bottom of a basket, which may be round, oval, square, or rectangular.
Border: The finished edge at the top of a basket, often created by folding and tucking stakes.
Coiling: A technique where core material is wrapped in a spiral and stitched to create a basket.
Core: In coiled basketry, the inner bundle of material around which the wrapping material is wound.
Filler: Material added to increase the diameter of the core in coiled baskets.
Fitching: A decorative technique creating patterns by exposing portions of stakes.
God’s Eye: A crossed-warp starting structure for round bases.
Lashing: Binding two elements together, often used for attaching handles or rims.
Osnovna: The basic starting knot in some forms of coiled basketry.
Pairing: A weaving technique using two weavers that cross between stakes.
Plaiting: Weaving elements over and under each other in a checkerboard pattern.
Randing: The simplest weaving technique, using a single weaver in an over-one-under-one pattern.
Ribs: Strong support elements that form the framework of a ribbed basket.
Scalloming: Creating an uneven rim with deliberate curves or points.
Shaping: Manipulating the form of a basket through tension, stake positioning, or weaving patterns.
Slath: The crossing stakes that form the base of many round baskets.
Spokes/Stakes: The vertical elements around which weaving takes place.
Twining: A technique where two or more flexible weavers are twisted around stakes.
Upsetting: The process of bending stakes upward to form the sides of a basket.
Waling: A strengthening technique using two or three weavers to create diagonal patterns.
Warp: In plaited baskets, the elements running in one direction (often vertical).
Weavers: The flexible elements woven around the stakes or through the warp.
Weft: In plaited baskets, the elements running perpendicular to the warp (often horizontal).
Whaling: A triple twisted weaving technique that creates a strong structural row.
Wickerwork: A weaving technique using rigid stakes with flexible weavers.