
Introduction: The Timeless Art of Wicker Basket Weaving
Wicker basket weaving stands as one of humanity’s oldest and most practical crafts, beautifully blending functionality with artistic expression. For thousands of years, cultures worldwide have created these versatile containers using natural fibers, with evidence of basket weaving dating back to ancient Egypt and beyond. This traditional craft represents both practical necessity and cultural heritage, with distinctive styles emerging across different civilizations.
Today, the appeal of handmade wicker baskets continues to grow for several compelling reasons:
- Sustainability – Using natural, renewable materials provides an eco-friendly alternative to plastic storage
- Uniqueness – Each handwoven basket carries the distinct mark of its creator
- Personal satisfaction – Creating something beautiful and functional with your own hands
- Versatility – From storage solutions to decorative pieces, baskets serve countless purposes
In this comprehensive guide, you’ll discover everything needed to begin your basket weaving journey. We’ll explore various techniques, materials, and step-by-step tutorials suitable for beginners. Even if you’ve never attempted any fiber crafts before, don’t worry—with proper guidance and a bit of patience, you’ll soon be creating beautiful, functional baskets to enhance your home.
The versatility of handmade wicker baskets makes them perfect additions to modern homes, offering practical organizing laundry wicker baskets while simultaneously serving as attractive décor elements. Before diving into your first weaving project, let’s first understand the materials that form the foundation of this ancient craft.
Understanding Wicker Materials: The Foundation of Beautiful Baskets
Many people assume “wicker” refers to a specific material, but it actually describes the weaving technique itself. Wicker basketry can incorporate various natural and synthetic materials, each with unique properties and characteristics.
Natural Wicker Materials
Natural materials create baskets with authentic character and traditional appeal. The most common options include:
Reed: The most popular choice for beginners, reed comes from the inner pith of rattan palm and offers excellent flexibility and durability. It’s available in various widths, with #3 round reed (3/32” diameter) being ideal for beginners.
Willow: A traditional European favorite, willow provides exceptional strength and longevity. It comes in two main forms:
- Brown willow (bark on)
White willow (bark removed)
Rattan: Originating from Southeast Asia, rattan baskets feature a natural golden color and exceptional durability. The outer skin (known as cane) is often used for weaving chair seats, while the core is used for basket frames.
Other Natural Options: Eco-friendly wicker basket materials include:
- Seagrass – offers textural interest
- Raffia – lightweight and flexible
- Pine needles – creates distinctive coiled baskets
Material Comparison Chart
| Material | Flexibility | Durability | Ease of Use | Cost | Best For |
|---|---|---|---|---|---|
| Reed | High | Medium-High | Very Easy | $ | Beginners, most projects |
| Willow | Medium | Very High | Moderate | $$ | Traditional baskets, durable pieces |
| Rattan | Medium | High | Moderate | $$ | Structured baskets, furniture |
| Seagrass | Medium | Medium | Easy | $ | Textured accents, small projects |
| Synthetic | Very High | Very High | Easy | $$ | Outdoor use, colorful projects |
Where to Find Quality Materials
For beginners, it’s best to start with materials specifically prepared for basket weaving rather than attempting to harvest and process your own. Quality materials can be found at:
- Specialized craft stores with basketry sections
- Online basketry supply retailers
- Some garden centers (especially for willow)
- Craft fairs where established basket weavers sell supplies
When purchasing materials, look for even coloration, consistent diameter, and absence of mold or insect damage. Most beginners should budget $30-50 for enough materials to create several small practice baskets.
Proper preparation of these materials is crucial before you begin weaving, which we’ll explore in the next section.
Essential Material Preparation for Successful Weaving
The secret to creating beautiful, durable wicker baskets lies largely in proper material preparation. Natural weaving materials require specific preparation to achieve the flexibility needed for weaving without breaking.
The Soaking Process
Gather your materials and containers
– Use containers large enough for materials to lie flat
– Prepare clean, room-temperature water
– Have towels ready for after soakingDetermine appropriate soaking times
– Reed (thin): 30-45 minutes
– Reed (thick): 1-2 hours
– Willow: 2-3 days (or longer for thick pieces)
– Rattan: 30 minutes to 2 hours depending on thickness
– Seagrass/Raffia: 15-30 minutesSubmerge materials completely
– Use weights if necessary to keep materials underwater
– For very long pieces, coil loosely to fit containerTest for readiness
– Materials should bend easily in a U-shape without cracking or splitting
– Surface should feel pliable but not mushy
– Color typically darkens slightly when properly soaked
The Mellowing Process
After soaking, materials benefit from “mellowing” before use:
- Remove from water and wrap in damp towels
- Place in a plastic bag to maintain humidity
- Allow to mellow for 1-2 hours
- This distributes moisture evenly through the material
Common Preparation Mistakes
- Under-soaking: Results in brittle materials that crack when bent
- Over-soaking: Makes materials too soft, leading to weak baskets
- Inconsistent soaking: Creates uneven flexibility and difficulty weaving
- Using hot water: Can damage natural fibers and cause discoloration
- Improper storage: Allowing wet materials to sit unwrapped leads to uneven drying
With properly prepared materials, you’ll need the right tools to transform them into beautiful baskets. Let’s explore the essential tools for beginner basket weavers.
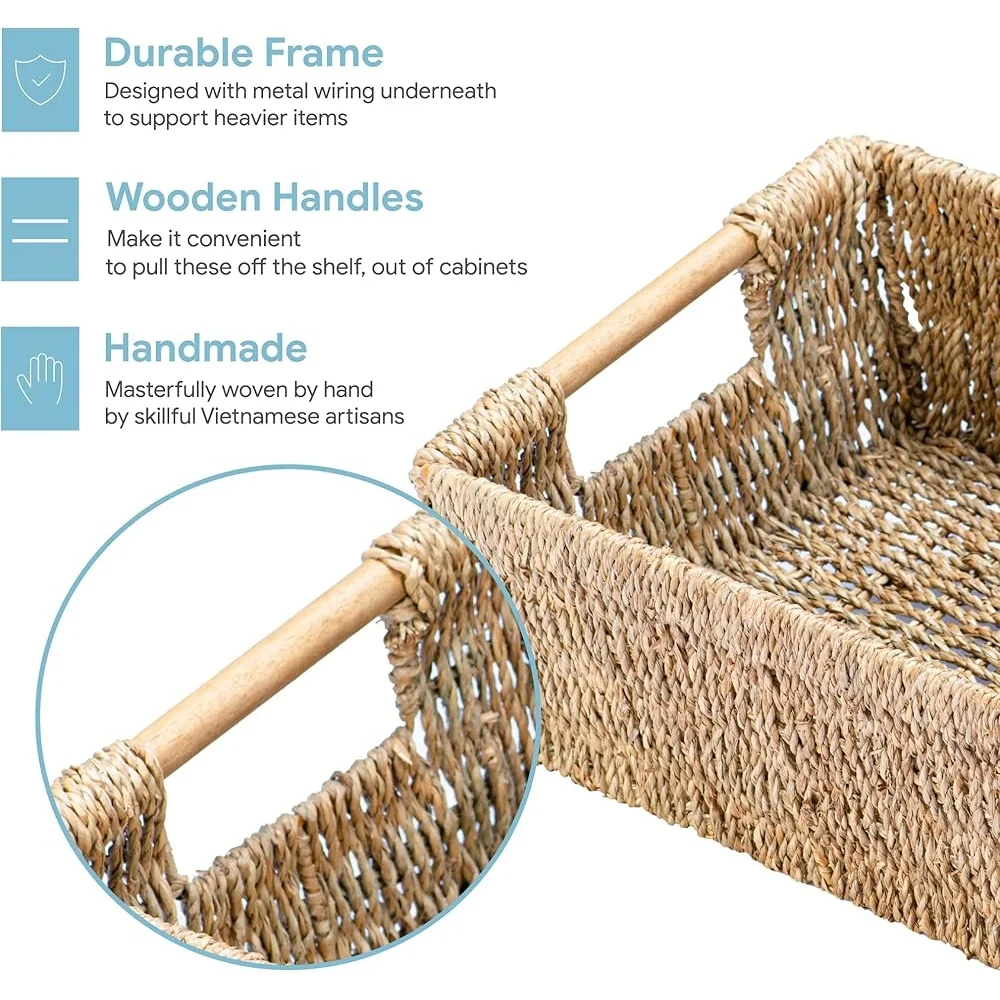
Must-Have Tools for the Beginner Basket Weaver
Creating beautiful wicker baskets doesn’t require an extensive collection of expensive tools. Most beginners can start with a few essential tools for basket weaving that are either affordable to purchase or can be found around the home.
Basic Tool Kit for Beginners
Cutting Tools:
– Garden pruners or heavy-duty scissors ($10-15)
– Utility knife for fine trimming ($5-8)
– Small wire cutters for tough materials ($8-12)
Measuring Tools:
– Flexible measuring tape ($3-5)
– Ruler or carpenter’s square for straight edges ($5-10)
Shaping Tools:
– Awl or icepick for creating holes and spaces ($5-8)
– Bodkin or large blunt needle for threading ($3-6)
– Wooden clothespins (20-30 pins for $3-4)
– Spring-loaded clips for holding elements in place ($3-5)
Moisture Control:
– Spray bottle for maintaining dampness during work ($2-3)
– Old towels for controlling excess water and wrapping materials ($0 if repurposed)
Budget-Friendly Alternatives
Many specialized basket weaving tools have household equivalents:
– Kitchen tongs can replace specialized basket clamps
– A thimble can work in place of a palm guard
– Chopsticks can serve as mini stakes for small projects
– Old butter knives (dulled) can function as basic bone folders
Tool Care and Storage
Proper maintenance of your tools ensures they last longer and perform better:
– Clean tools after each use to remove fiber residue
– Dry metal tools completely to prevent rust
– Store cutting tools in protective sheaths
– Keep a designated basket or container for your weaving tools
Optional Advanced Tools
As your skills grow, you might consider investing in:
– Specialized basketry scissors with curved blades ($15-25)
– Crimping tools for detailed border work ($12-18)
– A basket stand for holding work at comfortable heights ($30-40)
– Specialized basket molds for consistent shaping ($20-50)
With your materials prepared and tools assembled, safety should be your next consideration before beginning to weave.
Safety First: Protecting Yourself While Weaving
While basket weaving is generally a safe activity, taking proper precautions will help ensure an enjoyable experience free from injuries or discomfort.
Hand Protection
- Finger protection: Consider wearing a leather thimble or finger guards when pushing thick materials
- Moisturizing: Apply hand lotion after weaving sessions to prevent dryness from water exposure
- Glove options: Garden gloves provide protection when working with rough materials like willow with bark
- Rest periods: Take regular breaks to prevent hand fatigue, especially when working with stiff materials
Safe Tool Handling
- Always cut away from your body and hands
- Store sharp tools with blade guards when not in use
- Keep cutting tools closed or capped when reaching into your supply bag
- Consider using a cutting board or mat as a work surface
Creating an Ergonomic Workspace
- Position your work at waist height to prevent back strain
- Ensure adequate lighting to reduce eye strain
- Use a comfortable chair that supports good posture
- Keep frequently used tools within easy reach
- Consider a non-slip mat for your work area, especially when using water
Special Considerations
- Allergies: Some natural materials may cause skin irritation; do a small test if you have sensitive skin
- Splinters: Have tweezers nearby for removing small splinters from natural materials
- Material hazards: Check willow and other harvested materials for thorns before handling
- Water safety: Keep electrical devices away from your soaking and working area
With safety in mind, you’re ready to learn the fundamental techniques that will form the basis of all your basket weaving projects.
Mastering Basic Basket Weaving Techniques
Understanding core beginner guide basket weaving techniques provides the foundation for creating beautiful, functional baskets. Let’s explore these essential methods step by step.
Essential Basketry Terminology
Before we begin, familiarize yourself with these key terms:
– Spokes/Stakes: The rigid elements that form the structural framework
– Weavers: The flexible elements woven between the stakes
– Base: The bottom foundation of the basket
– Upsetting: The process of bending stakes upward to form sides
– Randing: The simplest weaving pattern (over one, under one)
– Waling: A structural weave that secures and strengthens
Creating a Base
Round Base Technique:
1. Select an even number of spokes (usually 8-24 depending on size)
2. Divide spokes into two equal groups
3. Lay one group horizontally, the other vertically, interlacing at center
4. Secure the center with a “God’s Eye” weave:
– Take a flexible weaver and fold it in half
– Place the fold behind one set of spokes
– Bring ends over and under in opposite directions
– Continue around 2-3 times, working outward
5. Continue with basic weaving around the spoke formation
Square Base Technique:
1. Arrange an even number of spokes in parallel rows
2. Weave perpendicular spokes through them to create a grid
3. Fold over and secure loose ends with a border row
Basic Weaving Patterns
Randing (Over/Under):
1. Insert weaver behind a spoke
2. Bring it in front of the next spoke, then behind the following one
3. Continue the over/under pattern around the basket
4. Keep consistent tension for even appearance
Pairing (Double Weavers):
1. Place two weavers behind adjacent spokes
2. Cross the right weaver over the left, then behind the next spoke
3. The new right weaver crosses over the left again
4. This creates a twisted rope-like pattern that adds strength
Triple Twining:
1. Use three weavers placed behind three consecutive spokes
2. Always pass the back weaver over the middle and front weavers
3. Continue this pattern around the basket for a decorative border
Adding New Weavers
When your weaver becomes too short or breaks:
1. Tuck the end behind a spoke on the inside of the basket
2. Insert the new weaver behind the same spoke
3. Continue the weaving pattern without disruption
4. Trim excess ends when basket is complete
Finishing Techniques
Simple Border:
1. Soak stakes thoroughly for maximum flexibility
2. Bend each stake inward at a 90-degree angle
3. Weave each stake behind the next stake and out to the front
4. Trim excess flush with the basket surface
Mastering these techniques requires practice, but even your first attempts will create functional baskets. Keep your weaves tight and maintain consistent tension for the best results.
Your First Project: Simple Round Basket Tutorial
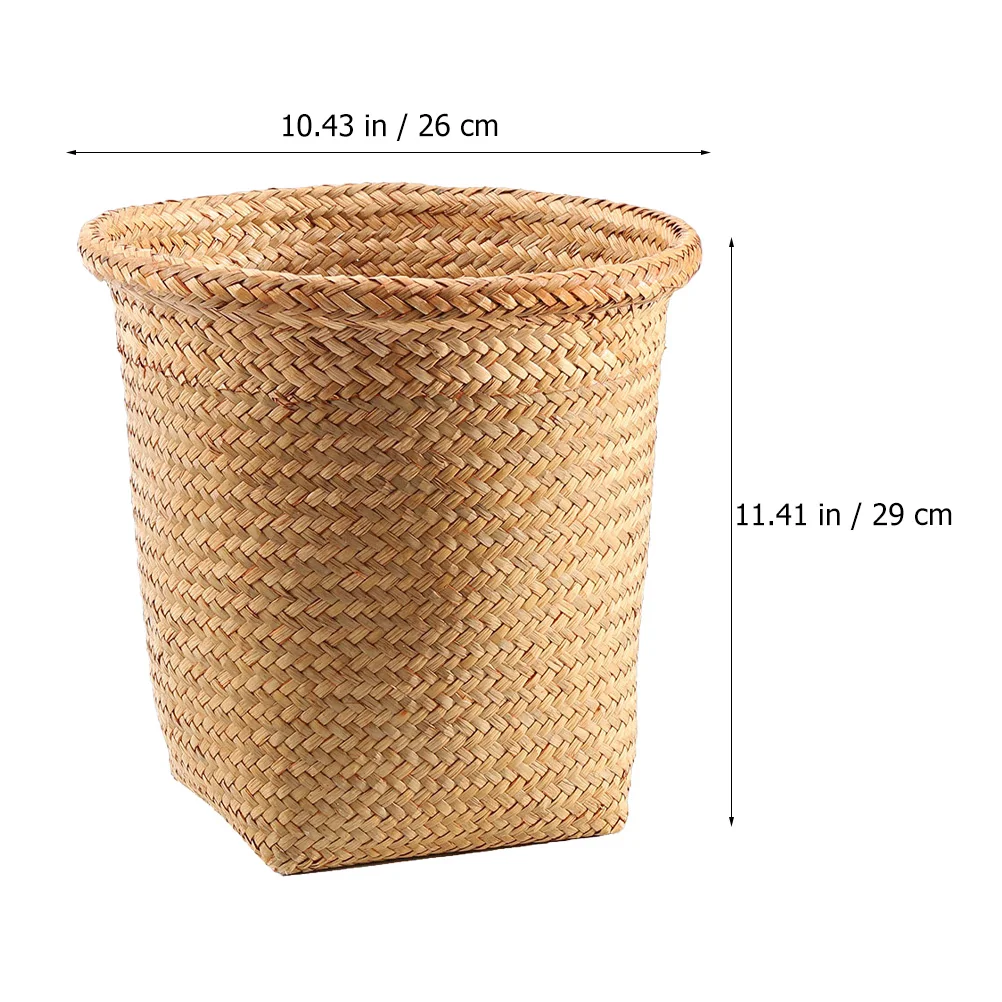
Ready to create your first basket? This simple round basket project is perfect for beginners. It combines several basic techniques while creating a useful, attractive basket approximately 8 inches in diameter and 5 inches tall.
Materials Needed
- 16 pieces of #3 round reed, 22 inches long (for spokes)
- 10-12 pieces of #2 round reed, 48 inches long (for weavers)
- 1 piece of #4 round reed, 36 inches long (for rim)
- Basin of water for soaking
- Spray bottle with water
- Scissors or garden pruners
- 20-30 clothespins
- Measuring tape
- Towels for controlling moisture
Step 1: Prepare Your Materials (15 minutes)
- Soak all reed pieces for 30-45 minutes until pliable
- Remove spokes first and wrap in damp towel
- Keep weavers soaking until needed
Step 2: Create the Base (45-60 minutes)
- Divide your spokes into two equal groups of 8
- Lay one group horizontally, parallel to each other with small gaps
- Weave the second group vertically through the first group
- Adjust to create an even cross with spokes radiating from center
- Secure the center with a “God’s Eye” weave:
– Take a thin, flexible weaver and fold in half
– Loop around center point and begin weaving in and out
– Complete 3 rounds of the God’s Eye pattern - Continue weaving in a spiral pattern for about 4 inches diameter
- Check that your base is flat and round as you work
Step 3: Upset the Spokes (10 minutes)
- Bend each spoke upward at a 90-degree angle
- Use clothespins to temporarily hold spokes in position
- Ensure all spokes are evenly spaced
Step 4: Weave the Sides (60-90 minutes)
- Insert a new weaver behind any spoke
- Begin basic randing (over one, under one) pattern
- Maintain even tension as you weave around the basket
- Add new weavers as needed when one ends:
– Tuck old weaver end inside basket
– Insert new weaver in same spot
– Continue pattern without disruption - Continue weaving until sides reach approximately 5 inches
- Mist basket with spray bottle as needed to keep reed pliable
Step 5: Create the Border (30-45 minutes)
- Soak the spoke ends again if they’ve dried out
- Bend each spoke to the inside of the basket
- Weave each spoke behind the next spoke and out to the front
- Continue around until all spokes are woven in
- Trim excess spoke ends flush with the surface
Step 6: Add a Rim (Optional, 30 minutes)
- Soak the #4 reed until very flexible
- Place around the top edge of the basket
- Secure with clothespins temporarily
- Use thin reed to lash the rim in place with X-shaped stitches
- Overlap rim ends and secure firmly
Step 7: Finishing (15 minutes)
- Trim any protruding ends
- Allow to dry completely (24-48 hours)
- Shape gently while drying if needed
This project typically takes 3-4 hours for a first-time basket weaver, not including soaking and drying time. Don’t worry if your first basket isn’t perfect—each one improves with practice!
Creating functional round wicker baskets provides a great foundation for building your skills. Once completed, your basket will be perfect for DIY laundry organization wicker baskets or other household storage needs.
Project Variations: Rectangle and Oval Basket Techniques
Once you’ve mastered the round basket, exploring different shapes will expand your basket weaving repertoire. Rectangle wicker baskets and oval designs require some technique adjustments but use the same basic principles.
Rectangle Basket Modifications
Rectangle baskets differ from round baskets in several key ways:
Base Construction:
– Create a grid of parallel and perpendicular spokes
– Space the horizontal spokes evenly along two base sticks
– Weave vertical spokes through the horizontal ones
– Secure with several rows of pairing weave around perimeterCorner Techniques:
– Corners require tighter weaving to maintain structure
– Additional corner stakes may be added for reinforcement
– Use triple twining at corners for extra strengthSide Weaving Considerations:
– Maintain consistent tension to prevent bowing
– Pay special attention to keeping corners square
– Add extra weavers at corners if needed for stabilityAppropriate Uses:
– File storage and office organization
– Media storage for books, magazines, or records
– Under-bed storage solutions
Oval Basket Techniques
Oval baskets combine elements of both round and rectangular techniques:
Creating an Oval Base:
– Begin with a center hoop of 4-6 spokes
– Add fillers along the length to create the oval shape
– Secure with several rows of weaving around the perimeterSpoke Arrangement:
– Use more spokes along the straight sides
– Create gradual curves by adjusting spoke spacing
– Ensure symmetry on both ends of the ovalShape Maintenance:
– Use temporary cardboard forms while weaving if needed
– Check proportions frequently during weaving
– Apply gentle pressure to shape during dryingBest Uses for Oval Baskets:
– Bread baskets
– Serving trays
– Wall-mounted storage
– Decorative displays
Material Adjustments for Different Shapes
Different basket shapes may require adjustments to your materials:
- Rectangular baskets benefit from slightly thicker spokes for structure
- Oval baskets work well with graduated reed sizes (thicker for base, thinner for sides)
- Consider using flat reed for bases of larger rectangular baskets
Each shape presents unique challenges and learning opportunities. Start with smaller versions of each shape before attempting larger projects.

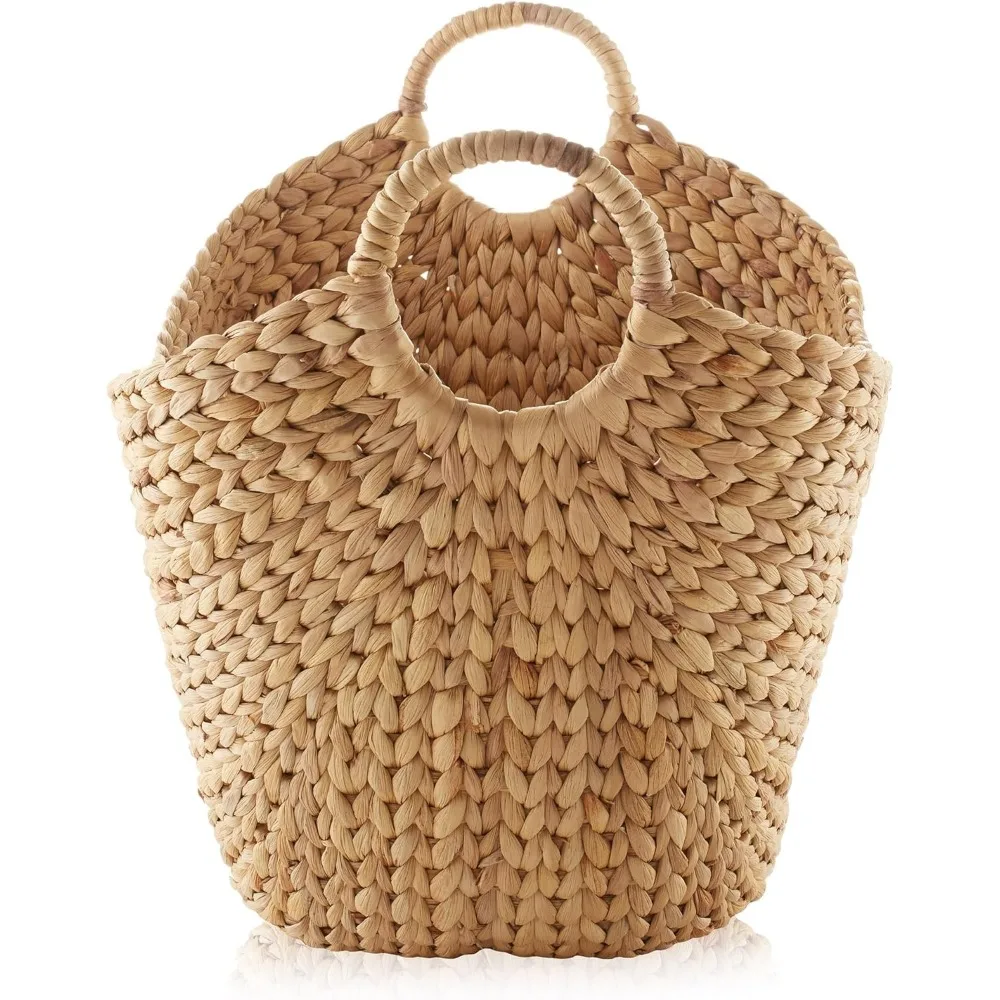
Black Wicker Baskets, Rattan Storage Baskets, Tall Wicker Baskets, Wicker Shelf Baskets, Woven Storage Baskets
5-Tier Distressed Black Wood Frame Storage Tower with Removable Wicker Baskets for Home Organization$715.80 Select options This product has multiple variants. The options may be chosen on the product page
Wicker Laundry Baskets, Woven Laundry Baskets, Woven Storage Baskets
$392.02 Select options This product has multiple variants. The options may be chosen on the product page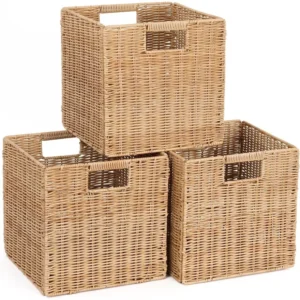
Rattan Shelf Baskets, Rattan Storage Baskets, Small Wicker Baskets, Square Wicker Baskets
Square Plastic Wicker Storage Baskets Set of 3 with Collapsible Design for Cube Storage Organization$185.47 Select options This product has multiple variants. The options may be chosen on the product page

Wicker Baskets with Handles, Wicker Storage Baskets, Woven Storage Baskets
$137.92 Select options This product has multiple variants. The options may be chosen on the product page
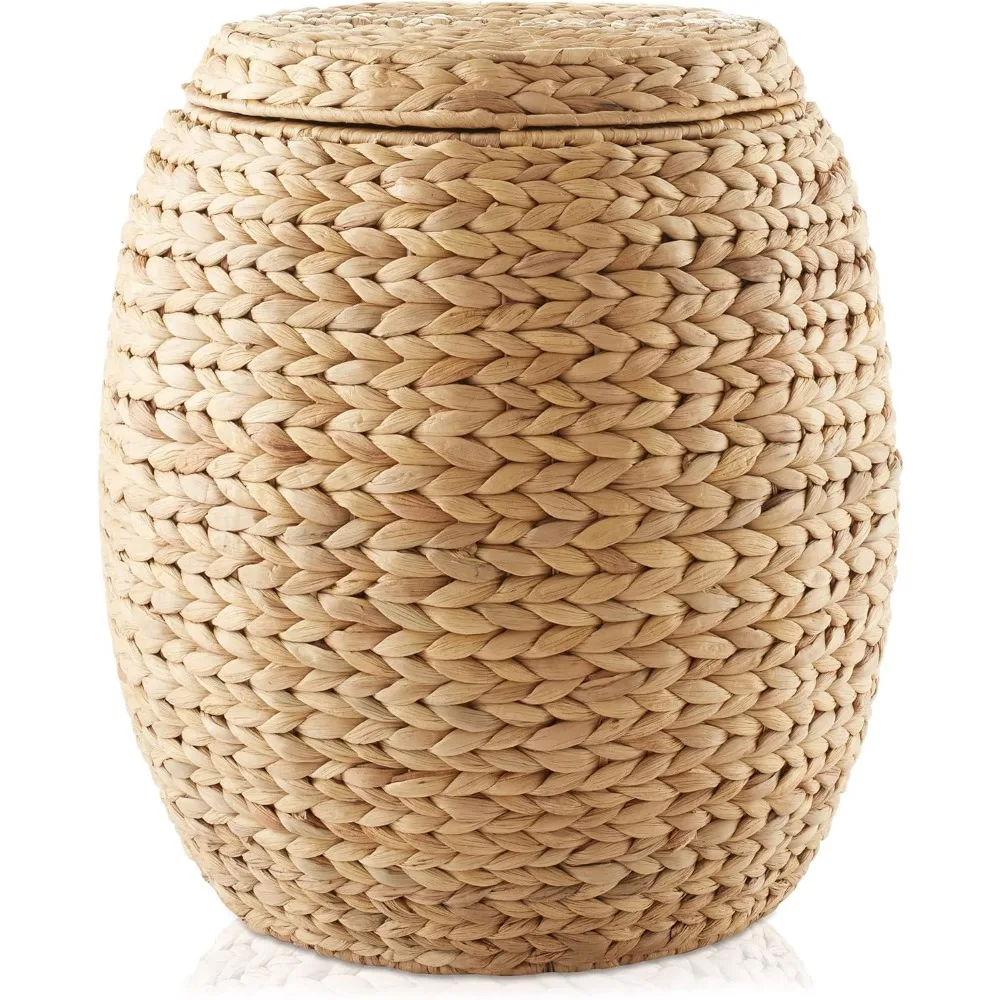
Large Wicker Laundry Baskets, Tall Wicker Baskets, Woven Laundry Hampers, Woven Storage Baskets
$130.54 Select options This product has multiple variants. The options may be chosen on the product page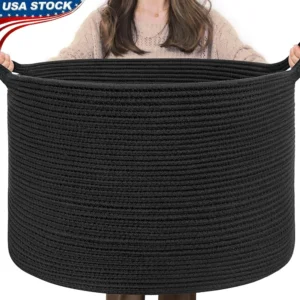
Wicker Blanket Baskets, Woven Laundry Baskets
$89.60 Select options This product has multiple variants. The options may be chosen on the product page
Troubleshooting Common Basket Weaving Challenges
Even experienced basket weavers encounter challenges. Here’s how to address the most common issues:
Uneven Weaving Tension
Problem: Basket sides appear wavy or irregular
Solution:
– Maintain consistent pulling pressure throughout weaving
– Use clothespins to hold weavers in place temporarily
– Check tension every few rows by gently pressing sides
– Correct by loosening or tightening as you go rather than at the end
Misshapen Baskets
Problem: Basket loses its intended shape during weaving
Solution:
– Use a form or mold inside the basket while weaving
– Periodically place on flat surface to check base levelness
– Adjust spoke positioning before they dry in incorrect position
– Reshape gently while damp during drying process
Breaking or Splitting Materials
Problem: Reed cracks or splits during weaving
Solution:
– Ensure materials are adequately soaked
– Re-soak materials that have dried out during work
– Use gentler bending technique, especially with thicker materials
– For splits, either replace the piece or reinforce with a new piece alongside
Gaps in Weaving
Problem: Noticeable spaces between woven rows
Solution:
– Pack each row firmly against the previous one
– Use a bone folder or blunt tool to gently push rows together
– Add an extra weaver if gaps persist
– Consider using a filler material for larger gaps
Material Drying Too Quickly
Problem: Reed becoming brittle during project completion
Solution:
– Keep a spray bottle nearby to mist occasionally
– Work in a cooler location away from direct heat or sunlight
– Cover partially completed work with damp towel during breaks
– Complete sections requiring the most flexibility first
Wobbly Base
Problem: Base isn’t firm or flat
Solution:
– Reinforce base with additional rows of weaving
– Add a supporting spoke if needed
– Place heavy books on base during drying to flatten
– Consider a double-woven base for larger baskets
Remember that even imperfect baskets are still functional and have character. Each challenge you overcome improves your skills for future projects.
Finishing Touches: Sealing, Staining, and Caring for Your Baskets
Proper finishing and maintenance will extend the life of your handcrafted baskets and enhance their appearance.
Optional Finishing Treatments
Natural Oils:
– Linseed oil creates a warm amber tone and adds flexibility
– Walnut oil darkens slightly while providing protection
– Apply with cloth and wipe away excess after 15 minutes
– Allow 24-48 hours to dry completely
Clear Sealers:
– Spray lacquer provides excellent protection with minimal darkening
– Water-based polyurethane creates a more durable finish
– Apply in thin coats in well-ventilated area
– Allow to dry completely between coats
Water-Based Stains:
– Offer variety of color options while allowing texture to show
– Can be diluted for lighter effect
– Apply with brush, cloth, or by dipping
– Seal afterward for maximum protection
Natural (Unfinished):
– Allows natural patina to develop over time
– Most traditional approach
– Easiest maintenance—simply clean as needed
– Best for purely decorative baskets
Long-Term Basket Care
Keep your baskets looking beautiful with proper maintenance:
Cleaning Methods:
– Regular dusting with soft brush
– For deeper cleaning, wipe with damp cloth and dry thoroughly
– Use non-toxic basket cleaning solutions for food baskets
– Avoid soaking finished baskets
Storage Recommendations:
– Store in dry location away from direct sunlight
– Don’t stack heavy items in lightweight baskets
– Use acid-free tissue inside stored baskets to maintain shape
– Rotate display baskets occasionally to ensure even aging
Humidity Considerations:
– In very dry environments, occasional light misting helps prevent brittleness
– In humid environments, ensure good air circulation to prevent mold
– Avoid drastic humidity changes which can cause warping
With proper care, your handcrafted baskets can last for decades, becoming family heirlooms that combine beauty with function.
Advancing Your Skills: Beyond Basic Basket Weaving
As your confidence grows, you’ll likely want to explore more challenging techniques and projects. Intermediate basket weaving projects offer exciting new possibilities for creativity and skill development.
Intermediate Weaving Techniques
Decorative Weaves:
– French Randing: Creates diagonal pattern by using multiple weavers
– Twill: Weaving over/under multiple spokes in consistent pattern
– Waling: Three-rod wale creates rope-like strengthening bands
– Chase Weaving: Inserting contrasting color materials for patterns
Handle Creation:
– Basic loop handles integrated during weaving
– Wrapped handle techniques for comfort and durability
– Swing handles attached after basket completion
– Carved wooden handles for specialty baskets
Mixed Material Incorporation:
– Adding wooden bases for stability
– Incorporating fabric elements as liners
– Using metal elements for reinforcement
– Combining different natural fibers for textural interest
Design Elements:
– Working with dyed reed for patterns
– Creating lids with proper fit
– Developing compartments within baskets
– Weaving decorative elements like flowers or figures
Resources for Continued Learning
As you advance in your basket weaving journey, these resources will prove valuable:
Recommended Books:
– “The Basket Book” by Lyn Siler
– “Contemporary Basketry” by Flo Hoppe
– “Willow Basketry” by Jonathan Ridgeon
Online Resources:
– Basketweavers Guild associations websites
– Video tutorials on specialized techniques
– Social media groups for basket weavers
– Digital pattern libraries
Community Connections:
– Local basketry guilds for in-person learning
– Craft festivals with basketry demonstrations
– Museum exhibitions of traditional basketry
– Cultural centers preserving basketry traditions
Remember that advancing your skills is a journey rather than a destination. Each new technique builds upon the fundamental methods you’ve already mastered.
Is Basket Weaving Difficult for Beginners?
Many people wonder about the learning curve for beginner basket weaving methods. While any new craft requires patience, basket weaving is actually quite accessible to beginners for several reasons.
The initial learning curve focuses on understanding material preparation and developing consistent tension in your weaving. Most beginners can successfully complete their first simple basket in one session (typically 3-5 hours), though it may not be perfect. The satisfaction of creating something functional, even with beginner mistakes, makes the process rewarding.
Common misconceptions include the belief that basket weaving requires special artistic talent or exceptional dexterity. In reality, the techniques are methodical and can be mastered through practice rather than innate ability. The most challenging aspects for beginners typically include:
- Maintaining even tension throughout the weaving
- Creating clean, tight borders and rims
- Developing the patience for proper material preparation
- Managing the physical demands on hands and fingers
However, these challenges are outweighed by the rewarding aspects:
– Immediate functionality of even first projects
– Visible improvement with each basket made
– Connection to traditional crafts and cultural heritage
– The meditative, stress-reducing quality of the weaving process
If you’re concerned about difficulty, start with a small, simple project using prepared materials. Take breaks when needed, and remember that imperfections add character to handmade items. With each basket you create, your confidence and skill will naturally develop.
Can I Use Materials from My Garden or Nature for Basket Weaving?
Foraging for basket weaving materials connects you deeply to traditional crafting methods while providing sustainable, cost-free supplies. However, it requires knowledge of appropriate materials and proper harvesting techniques.
Suitable Natural Materials for Foraging
Willow Varieties:
– Weeping willow (especially young shoots)
– Basket willow (Salix viminalis)
– Purple willow (Salix purpurea)
– Look for 1-2 year growth with straight, unbranched stems
Other Flexible Branches and Vines:
– Red osier dogwood (red stems in winter)
– Grapevine (wild or cultivated)
– Honeysuckle vine (invasive in many areas, so harvesting helps)
– Wisteria vine (after pruning)
Grasses and Rushes:
– Cattail leaves (harvest in summer)
– Sweetgrass (traditional for Native American baskets)
– Common rush (Juncus effusus)
– Wheat or rye straw (after harvest)
Best Harvesting Practices
- Harvest willow and woody materials in late fall through early spring (dormant season)
- Cut grasses and leaves during active growing season for flexibility
- Use sharp pruners to make clean cuts
- Take only what you need and never strip an area
- Obtain permission when harvesting from public or private land
Preparation Differences
Freshly harvested materials require different preparation than commercial reed:
Willow and woody materials:
– Use fresh (green) for immediate weaving
– Or dry completely then soak before use
– Remove leaves and side branches
– Split larger pieces if desiredGrasses and leaves:
– Use fresh or dry depending on desired effect
– Dry flat to prevent curling
– Bundle similar sizes together
Remember that using foraged materials may present challenges with consistency and durability, but they create baskets with unique character and connection to your local environment.
How Do I Fix a Wobbly or Uneven Basket?
Even experienced weavers sometimes create baskets with structural issues. Fortunately, many problems can be corrected with the right techniques.
Diagnosing Common Structural Issues
Before attempting repairs, identify the specific problem:
– Is the base uneven or warped?
– Are the sides leaning or bowing out?
– Is the rim uneven or twisted?
– Are there specific weak points or loose weaving?
Prevention During Construction
The best fix is prevention during weaving:
– Check base flatness frequently on a level surface
– Use temporary forms or guides while weaving
– Maintain consistent tension throughout
– Count spaces between spokes for even distribution
Correction Methods for Completed Baskets
For wobbly bases:
1. Dampen the base thoroughly
2. Place on flat surface with weight on top
3. Allow to dry completely (24-48 hours)
4. Add a thin wooden base inside if still uneven
For uneven sides:
1. Spray entire basket until thoroughly damp
2. Insert a form of the desired shape (bowl, box, etc.)
3. Use clothespins or clamps to hold problem areas
4. Allow to dry completely with form inside
For weak areas:
1. Identify loose or weak sections
2. Insert thin additional weavers alongside existing ones
3. Secure with tight weaving or thin binding material
4. Trim excess material when complete
If multiple serious issues exist or if the basket is severely misshapen, it may be better to save usable materials and start fresh. Each “failed” basket still teaches valuable lessons for future projects.
What Projects Should I Try After My First Basket?
After mastering a basic round basket, it’s exciting to explore the diverse world of your guide basket weaving styles through new projects. Consider this progression of projects to build your skills systematically:
Small Lidded Basket
- Skills practiced: Creating matched bases, fitting components
- Materials needed: Standard round reed, slightly thicker for rim
- Approximate time: 4-6 hours
- Techniques to learn: Measured weaving, border adaptation for lid
Market Basket with Handle
- Skills practiced: Handle creation, structural reinforcement
- Materials needed: Medium and thick reed, handle material
- Approximate time: 6-8 hours
- Techniques to learn: Handle wrapping, reinforced rim construction
Wall Pocket or Hanging Basket
- Skills practiced: Shaping techniques, hanging elements
- Materials needed: Standard weaving materials plus hanging hardware
- Approximate time: 3-5 hours
- Techniques to learn: D-shaped construction, attachment methods
Specialty Function Baskets
- Easter basket: Decorative colored reed incorporation
- Picnic basket: Rectangular construction with fitted lid
- Garlic or onion basket: Open weave techniques for air circulation
- Gathering basket: Reinforced base and handle for heavier loads
Skill Building Focus
Each project should introduce 1-2 new techniques while reinforcing skills you’ve already developed. Consider documenting your progress with photos of each completed project to see your improvement over time.
As you advance, you might want to explore specialty materials like black ash splint, pine needles, or antler incorporated into your designs. The possibilities are truly endless, with each basket reflecting your growing skills and personal creative expression.
Whether you make baskets for practical use in your home, as thoughtful gifts, or eventually for sale, the journey of learning this traditional craft brings both satisfaction and connection to generations of weavers before you.